《Metroid Prime 2 Echo》流程攻略

转载自IGN。
- Part 1
- Part 2
- Part 3
- Part 4
- Part 5
- Part 6
- Part 7
- Part 8
- Part 9
- Part 10
- Part 11
- Part 12
- Part 13
- Part 14
- Part 15
- Part 16
- Part 17
- Part 18
- Part 19
- DarkAether: Torvus Bog
Part 1
Light Aether:Temple Grounds
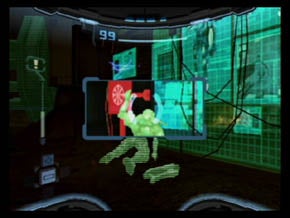
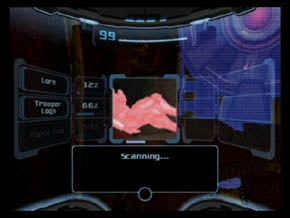
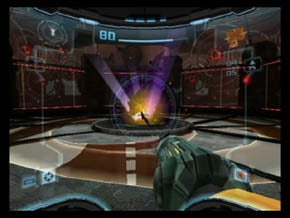
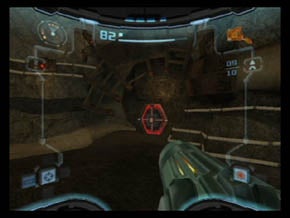
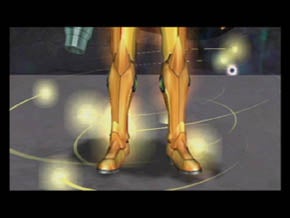
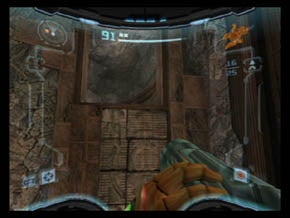
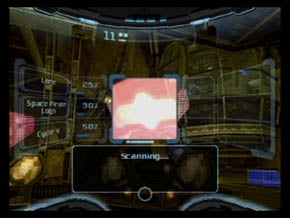
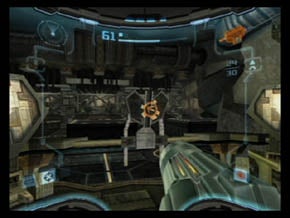
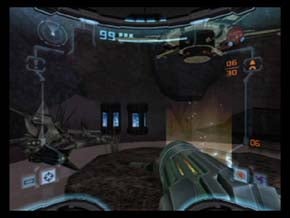
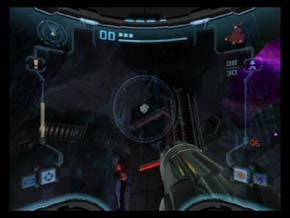
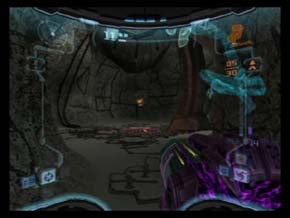
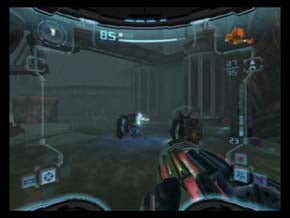
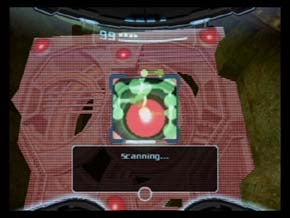
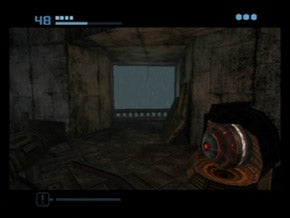
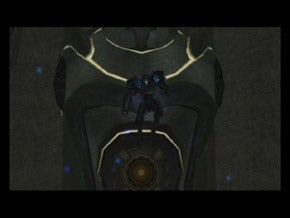
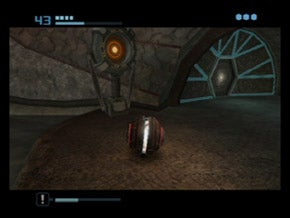
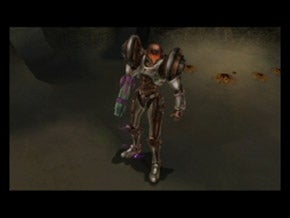
After the opening cut scene concludes, move to the crates near the ship and use them to leap on top of your vessel. Stand in the glowing blue circle to save your game. Press LEFT on the D-Pad to switch on your scan visor. Use the L-trigger (we’ll refer to it as L from here on out) to scan the ship, then scan anything else that glows on the screen.
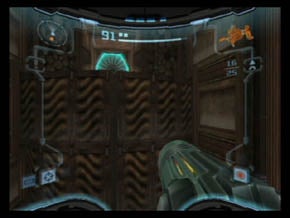
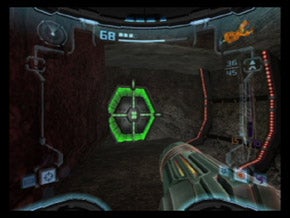
Now turn to the doorways grown over with webbing. UseL to lock on to the green centerpiece and blast it to remove the obstruction. Continue forward and blast the rest of the doors and you’ll reach a ledge. Jump up using the B button and continue to a glowing blue hex door. When you come across one of these in the game, shoot it with your primary weapon until it goes gray. Approach it and it will open.

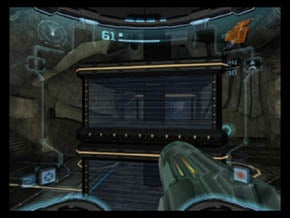
Head through a room overgrown with strange cave plants and hop up on the next ledge. The path splits here. Go down the right leg through some webbing and into the craggy hole in the floor. You’ll land in a room full of alien machinery. You can switch on your scanner here and scan the blue stuff to gain some research entries. Approach the grated door and look to the left, still in scan mode. Scan the red switch next to the door to disengage the locks at the top corners of the door. Lock on and shoot them off to open it.

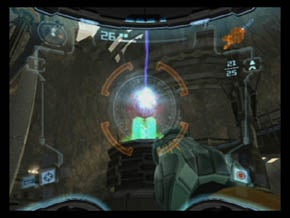
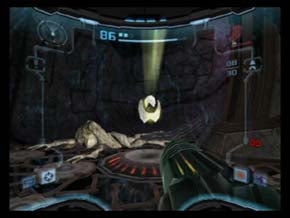
Squish through the next moist hallway and face right just before you get to the rock slab blocking your path. Scan the pinwheel switch there to make the slab slide back. In the next room, grab the rotating hologram to get the Map of this area. Once you have it, blast through the web door and head through the hex door that follows.

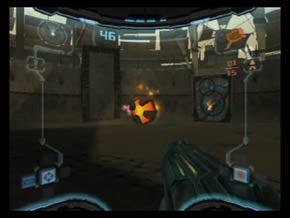
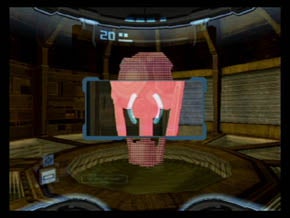
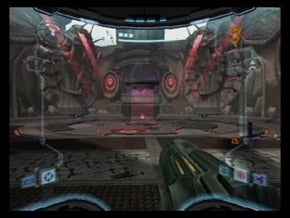
Several dead bodies dangle from the ceiling of the next chamber, and the room is teeming with alien life. Lock on and destroy the bugs that scurry over the walls and ceiling of this room. When they all drop, blast through the web door yet again and continue forward through the next hex door. Fire greets you in the room that follows. Avoid it and step forward toward the body slumped against the control panel. Scan the body to record some Lore to your memory banks.
Exterminate the enemies in this room and turn into a morph ball (press X) to get under the bars that block your path. Stay in the morph ball form and roll to the small opening next to the fire. Roll down the tunnel until you reach a gate that obstructs your path. Use a bomb on it (press A) and continue down the path.

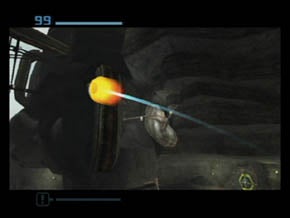
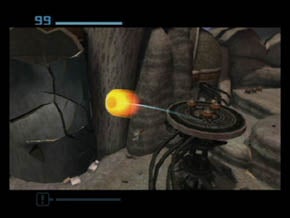
This will lead you to yet another room with dangling bodies in it. Stay in morph ball form and roll around the center computer console. Roll near the circular recepticle on this column and use a bomb to “jump” up into the circular space. Use another bomb once you’re locked into the column to restore power to the gate control system. As you attempt to leave the room, some dark matter appears and animates the corpses in the room. Lock on to them, charge up your weapon, and blast (once a ball of energy has collected at the end of your cannon). Be sure you grab the health they drop. Backtrack to the previous room and take on the newly reanimated enemies here. You can press and hold A to draw any of the dropped health pickups to you.
Once you’ve cleared the room, head back under the bars that separate the sides of area and turn on your scan visor. Scan the console near the slumped marine open the large door here. More enemies await beyond the door, so charge up your gun and blast,and make sure you strafe to avoid enemy fire.To do this, lock on and press LEFT or RIGHT on the left stick. Go through the newly-opened door, down the next corridor and through the hex door. Blast the crates in this area to clear a path to the next hex door.
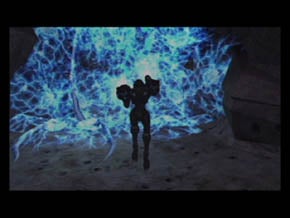
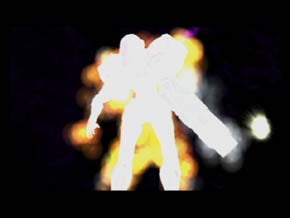
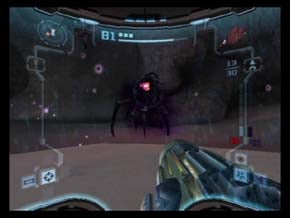
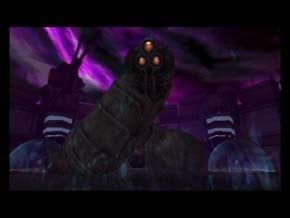
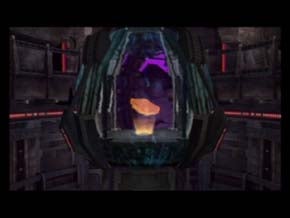
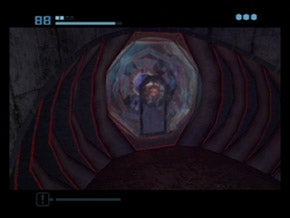
When you step into the ensuing room, the door will lock behind you, and a short cutscene will play. When you regain control, head to the cloud of black energy that is left behind and step in it. This will whisk you away to some sort of alternate realm. Watch the cut scene that follows. At the end of it, you’ll find yourself back in the original chamber, minus a lot of your abilities. It appears the creatures you encountered in the cut scene have stolen an essential gear from your power suit. You’ll have to make do without some abilities: Morph Ball Boost, Missile Launcher, Bomb Activator… all of these have been shut off.
Follow the cords on the floor down the corridor. Blast the large green spores on the wall to reveal an opening. Roll through it to enter another area full of reanimated marines. Sort them out and blow up the crates on the right side off the room (from where you entered) to expose a hex door. Go through it to find a Save Location. Save your progress, return to the mainroom and blast through thenext hex door. Thisleads to an elevator. Scan the console to theleft of the door to activate it and a hologram will appear at the center of the lift. Step on it to ride up.

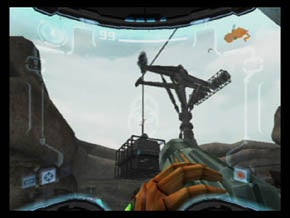
When you reach the area above, you’ll see a circular door to the right that is protected by a violet hologram lock. You don’t need to worry about that for now; head forward through the hex door and scan the console in the next area, disabling the locks at the corners of the door. Blast them and move through, stepping outside. Move straight forward off the ledge and scan the red console on the left side of the area. This will raise a large crate which you will need to move one more time. Head between the broken crane and violet hologram door and blast any flying enemies you see.
Head up to the rocks on the right side of the area and follow them to a metal bridge that roughly leads toward the sail structure.Continue along until you reach a scannable console near an up-tilted bridge (you can scan it to gain some Research). Scanthe console to the leftto remove the locks, and blast them when they’re unprotected using manual aim (press and hold R, look with the stick and shoot with A). Cross the bridge and work to a cave entrance, following it back to a hex door. Blast through it and continue until you reach a morph ball hole. Scan the body next to it to get some Lore. Go through the hole in the wall and roll to the next corridor. Go through the hex door here to head back outside to the Temple Grounds.
Part 2
Light Aether:Temple Grounds
Upon arriving outside, kill the vermin you see scampering around. Move up the path (following the metal tiles) past the large crate you moved previously. Severalaliens will attack as youmove toward the hologram door. Kill them and focus your attention on the console on the right side of the platform (facing the hologram door). Scan it to move the large black crate down. It will move partially, but you’ll have to shoot the frayed cable that holds it to bring it all the way to the ground. Use manual aim to tilt up and blast it.
Now that the crate has fallen, move to the edge of the ledge and jump to it, using it as a bridge to cross to the far outcropping. Blast through the hex door and enter. Follow the webby path back to a grated door. Scan it for a bit of Research then scan the red-glowing object to the left. This will open the gate and close one behind you. As the gate opens, be ready to defend against alien attack. Once you defeat it, head through the now-open door and the next hex door to get back outside.
Wind through the rocky valley, blasting alien vermin as you go. Scan the first pinwheel switch you come across (on the left side of the path near the grated door). This will raise a satellite, but unfortunately there is no signal for the time being. Move forward past the grate and battle a throng of animated marines on your way to the hex door at the far end. Wind through the webby path and take on the creatures at the opposite mouth of the tunnel. Make sure you take down the auto-cannon on the ceiling as well.
Next to the grated door ahead is a morph ball hole. Roll through it and scan the console switch in the next room to restore power to the gate. Be sure to scan the nearby corpse for some Lore , too. Return to the previous room and roll under the malfunctioning gate. Head through the hex door and follow the corridor out to another outside area.
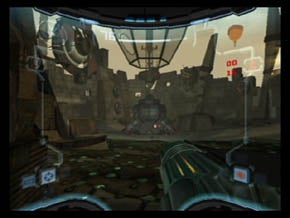
As you move ahead, you’ll notice a space vessel parked in the area. Move toward it to see a cut scene that partially explains what happened to the marines scattered throughout the base. When you’re finished watching, be sure to scan the marine corpses for more Lore. Head up the gangplank under the ship to move inside. At the top of the ramp, scan the pinwheel on the doors to open them, revealing the Map.
Get Missile Launcher
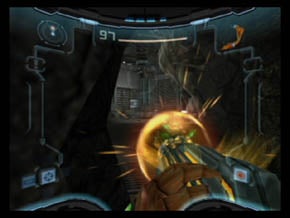
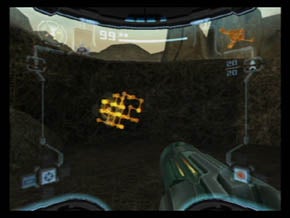
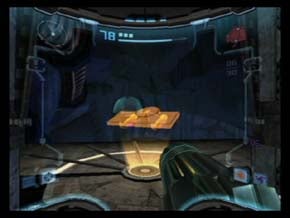
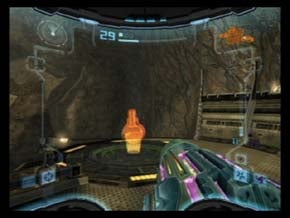
Leave the ship and find the large yellow crate near it. Blast it to acquire the Missile Launcher. Immediately upon acquiring it, you will be attacked by a number of the dark creatures you saw in the previous cut scene. Stay on the move and charge up your cannons as you blast them. Even though you got your launcher back, resist the urge to use it right now. Use your regular arm cannon to end the threat. Return inside the ship and go out the side near thee fire to jump to a rock ledge. Continue around until you reach a console. Scan it and a morph ball hologram will appear at your feet. Change into a morph ball and roll into the hologram and you’ll be fired across the map.
From where you land on the ledge, turn and look across the canyon. There is a locked hex door there. Blast it with a missile (Y) and drop down to that rock platform, heading across to the now-accessible hex door. Move through it and scan the marine body in the next corridor for some Lore.
Change into a morph ball and go into the hole to the right. Blast the insect-like aliens in the pit you’re dropped in. When theydie, switch on the scan visor and look up. Scan the console up on the ledge to activate another kinetic orb cannon. Switch to the morph ball and drop into the hologram to be launched out of the pit.
Go through the nearby hex door. Back outside,use missiles to take down the hives along the walls, or they will keep spawning bee-creatures. There is one on the right wall and one on the left. You’ll find more missiles along the right wall as well. Drop down and snag them then stand in the right corner and look up to see another hive. Blast it. From this position, do a 180 and look at the cracked, silo-shaped structure. Shoot a missile into it. Once you blast it, find the circular orb cannon on the ground in the corner. Search for a niche in the rock and scan the console hidden back there to activate it.
Change to a morph ball andd roll into the hologram and you’ll be blasted across the level and into the damaged silo. Stay in ball shape and roll to the next opening. This will take you to a track that you’ll roll along until you reach the area above where you just were. Go through the hex door. Inside the cave, scan the console switch to activate the elevator, and step on the hologram at its center to rocket up. You’ve reached the Great Temple.
Part 3
Light Aether:Great Temple
Move forward through a pair of hex doors and blast the flood of bat-like aliens that fly across your path. Near here is a small opening on the left side of the path. Drop into morph ball form andd roll through to find a Save Location. Be sure to use it then return to the previous hallway and go through the next hex door.

As you move into the next room, the door will seal behind you and you’ll have to battle through a series of Dark Splinters. Strafe back and forth and nail them with charged-up cannon blasts. They tend to rear back and spring at you, so be sure to move out of the way so you don’t catch damage as they leap. When you take them down, one foe remains.
Mini-Boss:Dark Alpha Splinter
This boss doesn’t start as a Dark Alpha Splinter. You need to damage it a little before the dark force interferes and makes it stronger (and also outfits it with its very own boss health bar). The idea throughout this fight is the same. Lock on and blast with either charged-up cannon shots or missiles, and strafe using the B button while locked on. This will help you avoid taking damage when the Splinter rushes you.

Never turn your back on this beastie, and always strafe! Watch out for the goo it shoots at you from afar as well. Strafing should also allow you to avoid this attack. When the boss falls, it will leave a ball of energy behind. Step into it to acquire an unknown alien item.
Head back to the elevator and take it up then go out the hex doors until you return outside. Here, you will meet U-Mos, Sentinel of the Luminoth. Listen to what he has to say… he explains the duality of the world you’re on, and the origin of the enemy you’re facing. He asks for your help in restoring his world to its previous splendour.He repays the favor by healing you completely. When you regain control, you’ll now have the power to open violet hologram doors with your scan visor. Turn around and scan the violet hologram behind you to get some Lore , and head back inside.
Take the elevator back down, returning to the boss fight room. Scan the violet hologram door and head through it to open the pathway to Agon.
Light Aether:Pathway to Agon
Move through the hex door and take down the energy creatures beyond. Watch out for electrical blasts from these enemies as you strafe and drop them. Move down the tunnel, leap up to the ledge and go to the next hex door. Once through it, move to another elevator, scan the console and step on the hologram to move down. You’ll arrive back at the Temple Grounds.

Go through the hex door and scan the next violet hologram to return back outside. You’ve been here before… it’s the area where you moved the large crate to form a bridge of sorts. Take down the Splinters in the area. (midway through the battle they’ll be infused with Dark and get even nastier). Makee your way to the blast-protected door and unleash a missile on it. Step through the hex door to claim an Energy Tank, boosting your total energy. Go up the ledge nearby and pass by the door marked with what looks like a purple (not violet) crystal. Move through the hex door beyond, blast the creatures in this corridor, and morph ball into the hole in the wall. Follow the path all the way back to the large canyon area where you dropped the lock ball bridge.
In the lower portion of this area is a violet hologram door. Scan itand go through, scanning the prone creature here for some Lore. Go through the next hex door and through asuspended glass tunnel.
Through the next hex door is anelevator, but be sure to blast the web doorto the left and claim your Missile Expansion before moving on. You know the drill–scan the console and a hologram will appear. Step on it to be taken down. Once below, go through a pair of hex doors to reach the Agon Wastes.
Part 4
Light Aether:Agon Wastes
The introductory cut scene shows you where you need to go. Head forward and take on the Sandigger that blossoms out of the sand. Beware his spit attack, and keep your distance. Charged blasts to the head will sort this bad boy out. Once across the sand, hop up to a low ledge and blast the shield-locked door here with a missile. Go through the exposed hex door and use the Save Location here. Return to the Wastes.
Head across the next patch of sand, battling the Sandigger here. Your goal is the low ledge on the far side. Hop up there and follow the ledges that skirt the canyon. At the top of the ledge, scan the vertical rock to see that it’s structurally unsound. Blast it with a missile to make it drop across the gap, forming a bridge to the center rock formation. Once on the other side, continue forward to find a similar rock spire. Scan it to see its weakness and blast it with a missile.
Cross your newly-made bridge (after clearing the enemies that swirl around it). The doorway you need to get to is barred, so turn around and jump back to the platforms at the center. Make your wayunderthe large solar unit (with the three red discs). Here, you will find a bridge.
Cross the bridge and follow it to a hex door. Go through and follow the corridor and enter the morph ball hole. Roll through the tunnel and across a contraption to the other side of the canyon. Head through the next hex door and wind through a narrow path until you reach an open area with sandfalls all around. Stepping forward will trigger a tough fightwith some Pirate Troopers. Don’t hesitate to use missiles against them if you’re having problems taking them down.

When the Pirates die, head across the area to a low ledge near the sandfalls. One the lower levels is a hex door. Go inside, change into the morph ball and roll into the kinetic orb cannon. It will shoot you to another cannon which will shoot you to the higher ledge. Go into the nearby hole to be taken to what appears to be a carbon copy of the last room. Roll into the cannon, and get blasted up to the top level, but this time, head off the right edge of the upper ledge to get the Missile Upgrade below. Return to the previous room.
Go back outside and keep climbing ledges. Use a missile and then a charged shot to take down the crab-like Brizgee then leap across to the circularr platform. Continue leaping, platform too platform until you arelooking acrossat another Brizgee. Take it down and leap across to the area in front of the yellow hologram door. Work counter-clockwise around these upper ledges, leaping across the sandflows. Once you get across the flow near the statue, use missiles to drop the rock pillar (scan it if you can’t find the weak point)and form a bridge to the next ledge. This leads to a hex door that can be opened with a missile.
Go through it and head to the next elaborate hex door, blasting the bat-like foes that swoop at you. Go through the next hex to re-emerge outside. When you head forward, you’ll be locked into an arena and forced into combat with a Sandigger.
Boss:Bomb Guardian
Once you damage the Sandigger a little, the Dark will touch it and change it into none other than… the Bomb Guardian. This guy is vulnerable in only two places–its head and its tail. That might seem unfair to you, simply because thee Guardian has so much at its disposal. It constantly barfs up morph ball bombs and casts them around the arena, and it’s your responsibility to avoid them or perish. The other thing ol’ Guardy likes to do is line up across the arena from you and charge, trying to snap you in its mandibles. If this is successful, it’ll do quite a bit of damage, so be sure that you have your dodging skills down.
The way to beat the Guardian is to stay locked onto its tail as you scoot around it, using the dash (lock on and double tap B while pressing a direction on the left stick). Circle the creature as you charge up your cannon, then let it fly. If you hurt its tail badly, the head will rear up.Tilt up manually, lock onto the head, charge a shot and let the worm have a faceful of cannon. Repeat roughly five times for a takedown.
Get Morph Bomb
Once the Bomb Guardian falls, head forward and grab your Morph Ball Bomb. Scan the various doors of the arena to see which has integrity flaws. Move to that door, turn into the morph ball and drop a bomb to get through. Make your way up the ledge. The doors here are locked, so head to the right. Look for the stones that block an opening at the end of the path. Use the morph ball bomb to blow through it. Roll underneath and keep going around the perimeter. You’ll pass a purple hex door on the left.
Keep moving until you see a ledge with a blue hex door on it. Go inside to find a security station. You know what to do… change into the morph ball, roll near the circular opening on the contraption, unleash a bomb to hop up. Once insidee the machine, trigger another bomb. The room will spin, and upon exiting you’ll be in a completely different area… the Agon temple.
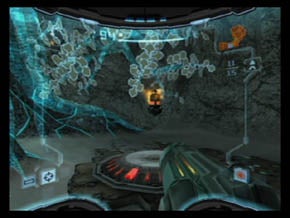
Move to the opposite end and scan the yellow device in order to trigger a holograph projection. The hologram explainsmore about the world you’re in and tells you that you will now be able to access amber doors. She also says that once you have taken the energy from the Dark Temple, to return at once. Go back to the previous room and morph bomb into the security device to get back to the previous area. Go through the door you originally entered the arena through and backtrack to the amber hologram door near the sandfalls. Open the door and search inside to grab a Missile Expansion upgrade.
Keep backtracking until you reach the structure you see in the picture above. Get right in the center crux and light off a bomb to drop to the kinetic cannon. This will rocket you up to grab an Energy Tank. Once you have it, head back down and continue rolling to the left. Continue until you cross the bridge under the solar appartus. In the channel between the two stone bridges you created on your way up is an amber hologram. Scan it for some Lore and continue down to ground level. Find the amber hologram door nearby and go through it. Change into a morph ball and use a bomb on the rock just inside the door to open a ball-sized tunnel. Roll through to collect the Map.
Return up the ramp and check out the right wall to find the conveyor belt. It will ratchet you up to a ledge. Roll all the way to the right and release a bomb to break the barrier and start the flow of sand. Roll through the sandflow and down to the circular indent in the wall. As you roll forward, change out of ball morph form. Leap across to the center platform then again to the semi-circular platform on the far wall. Change to morph ball and get on the conveyor here.

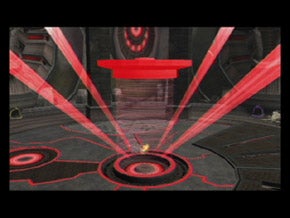
Roll to the edge and down, roll left and bomb the red barrier. This will duplicate the process you did on the opposite side of the room. Again, roll down into the circular portion, change to Samus and leap across to the center platform. Once over there, position yourself below the channel, drop some bombs and use them to “jump” up to the channel that leads left. Repeat this process on the next corner. Time your roll so that you miss the two other balls rolling around; they’ll damage you if they make contact. Once you get to the right, lay a bomb to blow up the barrier, and watch the short cinematic. It seems you’ve restored power! Head in the direction the energy is moving, switch on your scan visor and scan of of the circular red lights in the array. This will bring about a cut scene, and deliver you into Dark Aether.

Part 5
Dark Aether:Agon Wastes
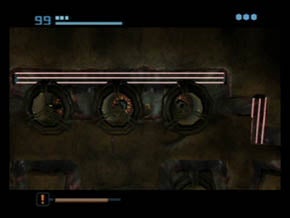
Dark Aether’s atmosphere is not friendly, so you have to stay within globular pockets of comfort, called Safe Zones. Some Safe Zones exist on their own, and others must be activated by shooting them. Once you shoot one, it won’t last forever, so move to it and find a new Zone quickly. If you stay in the atmosphere, your health will diminish rapidly, but once you reach a Zone, it will replenish.
Move to the Zone on the floor below and face front to see the blinking light. Shoot that to create a zone and go to it. From here, work your way to the far left corner of the room, where you’ll find a ball contraption. Hop up in it and place a bomb, which will open a nearby door. You’ll also be told that you’ve activated a device on regular Aether. Go through the door you created, quickly shoot the light to create a Safe Zone and head into it to heal. Move into the next room and hang in the Safe Zone, dropping the enemies (your first tasteof the Ing)that attack from outside.Remember, you can pull the pickups they drop to you from the safety of the bubble by pressing and holding A.

Once the threat has been neutralized, go to the far right of the Zone and target the next blinker in the tunnel ahead. Move to the newly-created Safe Zone and use a missile on the locked hex door. Dart into the Zone in the next room and commence with the killing. Move down thepassage in the right corner, activating the Zone as you approach. Watch for the pesky Inglet on the celing nearby. Once it dies, create a Zone down thecorridor, step to it and run to the next one. Here, you will find a Save Location.
From here, make a dash down the sandy hall to the hex door and go through, immediately shooting another Zone to life once outside. Move to the next zone in the sand to trigger a fight with an Ing Warrior. This badass will marshall the forces of dark energy to drive a kinetic burst into you in attempt to knock you out of your safe circle. Dash out of its way and return fire with charged-up cannon blasts. The creature will morph into a puddle and change locations during the fight, but you can shoot the goo and still do damage. Handy! When the creature perishes, look to the ledge ahead and run for the safety of its Zone.
From, here, you will have to get up the steps. See the moving Zone? Get inside that and follow it carefully as it ascends. At the top, get into the next safe area and look to the center of the level. There you will see another moving Zone, but it is moving laterally along a bridge. Wait until it is almost all the way to the right and jump to the center platform. As you move forward, shoot the temporary Zone light, hang in there for a second then make a dash for the moving one crossing the bridge. Shoot the light on the opposite side, scuttle to the safety you create, heal and then move through the hex door.
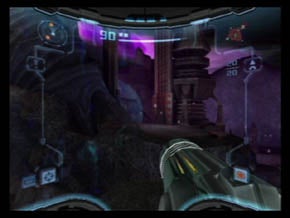
In the next tunnel, change to the morph ball and roll through the contraption you’ve seen before in the light world. Come to rest in the protective bubble in the next tunnel. Once you’ve healed from your rolling jaunt, blast the hex door and go through. Trigger the zone in the next area, step into it then dash to the next one. This will trigger a fight with the Jump Guardian.
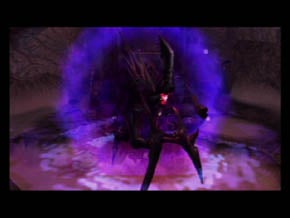
Boss:Jump Guardian
The Jump Guardian fights in much the same way as the Warrior Ing that you brawled earlier. It will summon spears of energy and cast them at you, so you need to be prepared to dash (lock on and double tap B) side to side to avoid the brunt of the attack. If you get hit by these attacks, they will knock you back into the atmosphere. You must stay in the protective circle, or you won’t last long in the fight.
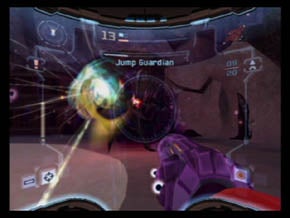
From time to time, this giant Ing will leap in the air and come down with crushing force that crackles your display. Don’t get rattled. Stay locked on and be sure to track the Ing everywhere. Patiently charge your shots and dodge. Fire when you have a full shot built up.
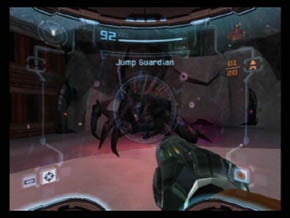
The Jump Guardian is spry for a big guy, and he likes to scamper around the edge of the Safe Zone. Stay with him and pelt him with cannon fire and the occasional missile, and the fight should go quickly. Upon defeating the Jump Guardian, you get Space Jump Boots.
Get Space Jump Boots
Once you’ve got them, head to the ledge ahead. From there turn right and shoot the Safe Zone onthe ledge in the distance. Move there and turn around to activate the Zone on the next platform up. Use your new Space Boots to make the jump. Hit the next light and the next, making your way around the rim to the last permanent Safe Zone. You’ll have to double jump to get to that last ledge. Go through the hex door after opening it with a missile. Activate Zones as you move down the tunnel to the far hex door (this territory should seem familiar from Light Aether).
You’ll exit to the arena area where you battled the Bomb Guardian in regular ol’ Aether. Turn left and activate a Zone and head over to it and do that once more to move further down. Near the second Zone is a hex door. Shoot it and step inside to acquire the Dark Temple Key. It is one of three needed. Head back to the Zone and make your way back to where you entered. Backtrack all the way to the save point and save your game. Return to the room where you stepped through the portal and activate it by scanning one of the red discs. Step into the portal to head back to the realm of light.
Part 6
Light Aether:Agon Wastes
Once back in the light realm, you’ll be in a brawl with three Dark Pirates. Let ‘em have it with your charged cannon, and be sure to dodge to avoid their beam attacks. Go across the room and look in the left corner for where you used the bomb slot in the Dark realm. Head through the door that youopened. This leads into a curved room with anotherbomb slot in it. Bomb jump up to it and activate it (by bombing again) to drop the gate and reveal a Missile Expansion. Go down the next hall and ride the sandflow down to the save location.
Now head back to the sandflow room with circular platforms at its center (Mining Station A). Work your way to the top of the room and approach the statue in the midle of the sandflow. Jump on the statue’s head using the space jump, then space jump up to the square passage nearby.
Follow the curving path until you reach a scannable console and an amber hologram. Scan the hologram for some Lore then scan the console and the gates behind the statue will open. Return to the top of the statue’s head and space jump up to the now-available ledge and go through the hex door.
Follow the path to find a pair of Pirates. Charge up a shot and hit the canister that they are standing near in order to drop them both. Blast the locked hex and go through it. You’ll emerge into a sandy courtyard that is all ablaze. As you step forward, several waves of Dark Pirates will attack. Drop them with charge cannon attacks or missiles. There are three waves, and the third head for a pair of green cannons on a ledge ahead. Missiles will easily sort the gunners out.
When the fight is over, the laser shield across the hex door will fade, opening a path. Before going through, blast the crates for regenerating power-ups. Go through the door, switch to morph ball and lay a bomb on the cracked floor to get underneath the grating. Drop another bomb down below to clear the crates and find an opening for the ball.
Rolll through the tunnel until you find youself beneath the floor of a gathering area of Pirates. This section of tunnels has electrified gates in it. Time your roll so you don’t hit those zaps, and work all the way to the right, curving around to find a Missile Expansion. Return to the left and continue until you see a short cutscene. When it concludes, stand up and go to war with the collected enemies. After they die, be sure to scan all of thee glowing stuff here for tons of Research **and **Lore.
The final thing to scan is the red console switch. This will activate the nearby mini-elevator. Take it up to the catwalk, leap to the next segment and fight the Pirate. Killing him will open the hex door at the end of the catwalk. Beware of the Pirate that attacks from within the glass as you make your way over there. Once through the hex, you’ll see a short cutscene… another appearance from Dark Samus! You won’t be able to open the gate ahead, so wrap around the corner and use a missile to open the locked hex door there. This will allow you access to the glass lab you saw previously. Scan the computer terminal ahead to bypass security in the lower room.
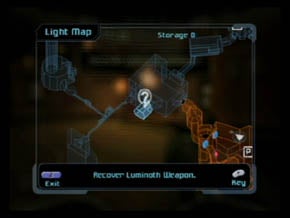
Return to the lab below and head through the door behind the barricade you just lowered. In the ensuing room, drop the auto-turrets with some locked-on missile attacks. Turn into the morph ball and roll through the crisscrossing lasers, use a missile on the hex door and go through. In this lab, several more Pirates await. Wax them and you’ll get a message that a Luminoth weapon has been located. Refer to the map to see its location.
Scan the console at the back of the room to activate the lift and step on. Once up top, battle the Pirates that appear. Before leaving this room, scan one of the Metroids floating in the glass tanks. Scoot around the right side of the main tank to find the hex to exit.
Take down the turret in the ensuing corridor and move to the next chamber, which contains a bomb slot. Activate it to open a new path. Go through to find a large, cavernous room (the Bioenergy Productionroom)with many crates stacked in it. As you move forward, two Pirate Aerotroopers will swoop in. Deal with them swiftly to activate a console at the back of the room.
Go up the stairs on the indicated structure and scan the console with the hand icon. This will make a series of the crates in the room rise. Once they’re activated, move to the opposite end of the room. Here, you’ll find three series of controls. Facing the crates, scan the left console’s left hexonce, the middle one’s left hextwice, and the right console’s left hex three times. This will make a series of stairs out of the crates. Space jump up them to get to an Energy Tank on a platform attached to the wall.
When you have that, head back to the consoles and reverse the order of the crates,so they make stairs right to left. Climb the new arrangement of crates and go through the hex door to find a morph ball tunnel. Plant a bomb to hop up to it and roll through. You’ll reach a side-scrolling portion where energy doors block your path. Use the bombs to jump up a ledge and time it so that you avoid the lasers. When you get above one of the electric doors, place a bomb to disable it. Get all the way to the left side and roll out of here.
The ensuing tunnel leads to a locked door. Missile it and go through.You’ve reached a Save Location. Go through the next hex door to reach a Sand Processing room. Go down the sand hill andd eliminate the turrets that appear (missiles do nicely). Switch on the scan visor to find a weak section of the area. Use a missile on it and head through a tunnel to find yourself in the Main Reactor. Time for a boss fight!
Boss:Dark Samus
Dark Samus certainly is athletic! She’ll cruise all over the arena and pelt you with blasts of her own, but those are pretty easy to avoid. Your main job is keeping up with her. Stay locked on and keep an eye on the radar to see where Dark Samus is hiding. Once locked on, keep pelting her with missiles until you run out. Then switch to your charged-up arm cannon.
Dark Samus will pause frequently to raise a shield, but don’t worry too much about that. Just keep blasting away, hitting whenyou can. Be sure to strafe when locked on to avoid her attacks. Midway through the fight, a short scene will play, and Dark Samus will up the ante. Now she will start firing huge bursts of powerful missiles. The best way to avoid these is to hide behind the pillars. She will also rise in the air and launch herself at you… and you better be protected by a pillar, or you’ll take massive damage. After she lands, waitt for the shield to go away and hit her with a charged cannon blast. A few of these and Dark Samus will be history.
Get Dark Beam
Upon completing the fight, step on the nearby elevator and ride it up. Enter the hex door nearby to acquire the Dark Beam . Leave the room and move to the door with a white crystal on it. Shoot it with the Dark Beam to open it, go through and head through the next hex door. In the ensuing chamber, use the Dark Beam ona crystal door. Be sure to scan one of the computers here for some Lore. Dark Beam the next crystal door and step through into the Command Center. Now, there are some new foes afoot… Pirate Grenadiers. Sort them out quickly, or they’ll hurt you bad. When they die, move to the dark portal in the lower portion of the roomand hit it with a Dark Beam to activate it. Step through to return to the Dark Wastes.
Part 7
Dark Aether:Agon Wastes
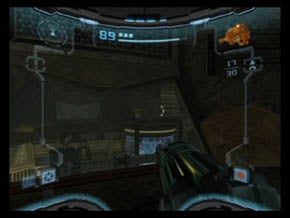
You’re back in the Dark realm. Remember how to shoot the blinking lights to form Safe Zones? This time around, you may find that some of them are covered in dark matter. To get rid of this, hit the dark stuff with some blasts from your normal cannon, and hit them again when they are blinking in order to form the needed shield.
Move around the perimeter using Safe Zones until you see the device indicated in the picture above. Scanning it will reveal thata Luminoth device is within. Go to the Zone directly behind it and hit the switch with a missile. This will expose a crystal. Nail it with your Dark Beam and the entire platform will come down. Space jump on top of it then jump across to the Dark Temple Key. Once you have it, go back to the center platform and leap over to the otherhigh ledge. Open the hex door here with your Dark Beam.
Move through the corridor using the Safe Zones and watch out for the big Ing that cross your path. It will swipe at you inside your cocoon of safety, so stay back and blast it with (gasp!) charged shots. Move down the hall and exit through the hex door. In the ensuing hallway, drop the Inglets and move right down the path to the hex door near the portal(the left door that you can see from this Safe Zone is unavailable for now). Once through the door, light up the Zone in the narrow passage and continue forward to a room with a tower with red trim at its center.
Go around the backside of the tower and look up to see a crystal at the top (scan it quick for some Research). Hit it with a Dark Beam shot to bring it to groundlevel. Jump on top of it and space jump up to the ledge above. Move to the locked hex door and shoot it to open it up. Scoot to the next room to find a Save Location. Go out the other door in the save room and turn into the morph ball. Roll down the ball tunnel quickly until you come to an obstruction. Use a bomb on it to gain access to the ball maze.
This room is called Bitter Well, and it certainly can be if you do it wrong. On the left edge of the Safe Zone,. use a bomb jump to get to the higher ledge. Roll toward the center of the area, but be careful not to roll down into the danger area below (if you do, you’ll need to quickly bomb your way up and out). Pause at the center crux and plant a bomb. Roll ever so slightly further right to propel yourself across the center divide. Once across, roll through the ensuing tunnel and to the next room. Go out the next hex door and move to the elevatorhologram.
As you reach the room below, look tothe left and blast the beacon there to pop up a Safe Zone. From here, you’ll see a stack of crates. Circle behind it and shoot the light to stay in the zone. Scan the console here. Return back across the room past the elevator and activate the zone to the right.From here, hop on the ledge that runs along the right side of the room. Blast the light near the console here and scan the console. Shoot the beacon on the nearest platform and jump to it, and repeat the process as you hop up the floating discs, reaching the top of the room. This will shut off thefinal security switchneeded to access the next door. Return to ground level and head through the now-available hex passage.
Make your way through the next corridor until you reach the Watering Hole. See the beacon covered with darkness across the way? Shoot it until you form a Safe Zone, space jump to the platform left of it and make your way across the room to the locked door. Blast it open and move to the next area, where you will see a couple of towers like the one you recently lowered. Move around the perimeter of the room, hopping zone to zone, and drop into the room below. Scan then kill all the swarming Nightbarbs. Space jump to platforms behind the twotowers (popping up Safe Zones as needed) and use the Dark Beam on the crystals to drop them down.
Get Light Beam
Use space jumps on the newly-dropped platforms to get to the dark door at the top of the room. Blast through the door to find the completely unguarded Light Beam. Sweet! This weapon is very well-suited to cutting through the denizens of the Dark realm. Return to the platform you stood on to drop the towers in this room and use the Light Beam to get through the door. Vanish the Weblings (scan them first)that stretch across the path and make your way back to the room marked Doomed Entry on the map. Use the Light Beam on the Safe Zone crystals (the permanent ones) to create Energized Crystals (scan them as well for a bit of Research). These Energized Crystals will create toxic bubbles for any Dark creature.

Get up on the central platform and consult the map to find the direction you have not been yet. Head through the dark door on the upper ledge to get to the Double Path. Your Light Beam should make short work of the enemies here. Go through the corridor and emerge through the light hex door to reach the Battleground. There is a Temple Key in the safe zone below. However, when you drop down into the Safe Zone and approach it, the key will vanish and you’ll have to fight a throng of Warrior Ing.
Before doing anything, be sure to scan the far door to get the Ing Webtrap Research. Then get to the business of dropping the Warrior Ing. Use your Light Beam and Missiles to take them down quickly. When you do, go through the door that was previously web-trapped. Blast the tentacles that block your path (charged up shots will knock them back) and space jump over the goo to get to the far door. Fight your way back to Doomed Entry and make your way to the top of the room using the rock platforms. Bust through the dark door and go follow the path until you reach Dark Oasis. Go through the left door and use your Light Beam on the portal and step into it to return to the Light world.
Light Aether:Agon Wastes
Backtrack to Save Station B and use it to record your progress. Check your map and make your way to Bioenergy Production. What’s this? It seems that Metroids are now freely roaming in this area. Use Dark Beam attack to neutralize them, and finish them off with missiles. Proceed to the next area and use the bomb slot to turn the room and get to Biostorage Station, where you’ll run into even more Metroids.
Move to the opposite end of the room and open the dark door to secure another Missile Expansion. Exit the room and make your way to the hex door in the lower portion of the room. Roll through the lasers in this hallway,and you’ll find yourself in theCommand Center. Waste the Grenadiers here and use the elevator to get to the upper catwalk. Blast through the Light door here to make your way to the Central Mining Station.
Once you get there, man one of the turrets and take down the three gray generators in this area. One is ahead and slightly to the right, one is to the left and below and one is on the far left across the way. The reticule will turn red when you are lined up to shoot one of them, so let fly. You’ll also have to opportunity to use the turret on some of the pesky Pirates… so sort them out!
Once you have, double jump up to the parked ship (scan it, too)on the left wall and use this to leap up to the center supports. Make your way across the center of the level and to the rock ledge that leads into a cave-like lab. Scan the computers here for Lore and continue to the left to take a small ramp up past an energy shield. Go to the morph ball hole past it and cruise inside for a Beam Ammo Expansion. Scan the dead creature here for more Lore.
When you have the expansion, exit and drop to the area below. Then go through the nearest hex door and make your way to Mining Station A and use the map to navigate back to Save Station A. Save your progress. Go all the way to Portal Terminal and scan the red node on the portal to activate it and step inside.
Dark Aether:Agon Wastes
Once you arrive in the Dark land, head to the sandfall room (Judgment Pit) and use Save Station 1–it’s through the dark door on the ledges near the top of the area.

From here, use the map to head to the Dark Agon Temple. Once you arrive, step into the center Zone and the Temple Keys will find their places, opening the path to the temple proper. This will bring about a fight with the Temple’s resident badass, Amorbis.
Boss:Amorbis
Every game needs a giant worm boss, and Prime 2 is no exception. This fight requires careful observation of your surroundings, so stay on your toes, and keep an eye trained on the radar. You always want to be looking there to see where the worm is going to attack next. It will weave in and out of the soil, making huge archs as it leaps from the ground. Track its movement, and be sure to avoid it as it surfaces and burrows. Make sure you scan it at the beginning of the fight

When you see it up in the air,lock on and hit it with some missiles or Light Beam blasts. After a couple of directhits, the worm will change tactics. It will attach itself on the centersphere and try to strikeyou. Nail it with a charged Light Beam blast. This will knock its faceoff and cause the worm to try to suck you inside of it. Change to morph ball and let it do just that. Once inside, repeatedly drop bombs to waste the worm from inside. Be sure to consistently pick up the plentiful goodies that the worm drops when you hit it.
After you beat the first worm, two more will show up. The tactics are the same, butwhen the worms join in the center, they will now have an extra attack… an energy beam that the combined worms direct at you. Dodge it and continue hitting them in their respective heads. When the faces come off, go inside and lay some bombs. After the two worms, you will face three. Same ideas apply.
Get Dark Suit
When you tear through all three worms, head to the center of the area to see a familiar logo. Grab it and you will be awarded with the very nifty Dark Suit. The damaging effects of Dark Aether will do less damage to you in this suit. After you get it, head forward to the platform that raises up and continue to the hex door to get to Dark Controller Access. Use the bomb slot to rotate the room and exit through te available door. Walk to the center of the area to get the energy here.

Now head all the way back to the Portal Site (save if you want on the way back). Scan the red discs around the portal to activate it and go through.
Light Aether:Agon Wastes
Back in the realm of Light, make your way all the way back to the Agon Energy Controller. Give up the energy you took in to restore power to the temple and make U-Mos a happy camper, indeed.

Now that this leg of the journey is complete, return to the Agon Temple and head through the Mine Station A, then Mining Access, Mining Plaza, Plaza Access and take the elevator in the next room up to the Temple Grounds.
Light Aether:Temple Grounds
From here, make your way to the Temple Assembly Site. Go up the elevator in this area and follow the path to the Temple Sanctuary. Go up the elevator here to speak with U-Mos again. He senses Ing movement in the Torvus region, so you’ll need to go there. Head back down to the Temple Sanctuary.

Scan the amber hologram door to access the Pathway to Torvus. Use the Light Beam on the purple crystal inside to open the path. Scan the Harmony Class Drones in the next hall and move to the opposite hex door. Scan the console at the far end of the next room to activate the elevator. Drop down to the Temple below.
In the next room, scan the amber hologram door to enter the Meeting Grounds. Head through the U-shaped portion of this area and go through the hex door to reach the Hall of Eyes. Hop up on the rock bridge that bisects the area to find a portal. Use the Dark Beam on itand step in to get to the Sky Temple Grounds.
Part 8
Dark Aether:Sky Temple Grounds
Stay on the bridge and head for the nearby hex door to get to the Abandoned Base. Snake down this path, avoiding lasers as you make your way to a dead end. Hop up on the ledge here and turn into the morph ball to get a boost from the piston on the right. Once in the tunnel above, roll to the bomb slot and activate it. Return to the piston and roll over to the left side of the path. This time, roll all the way left and bomb each of three slots as you make your way to the right. The idea is to make all of the calipers that secure the gondola at the center of this area come down so that it becomes unlocked and mobile. When you do it correctly, you’ll hear the signature Prime victory noise and the gondola will havea hologram at its center. From between the two pistons, turn back into Samus and jump over to the gondola.
As you ride the apparatus, use the left stick to aim at the Nightbarbs that swoop at you. When the gondola comes to rest, hop to the ledge that houses the portal. Shoot it with a Light Beam to activate and step through.
Light Aether:Temple Grounds
When you get through, you’ll find yourself in thePath of Eyes. Drop off the ledge and battle the Pirates then shoot the purple crystal with a Light Beam to move the door. Continue forward until you have to leap over a wall in order to progress. Shoot down the Grenadier in the distance then flip around and move itforward by shooting the crystal with the Light Beam. There is another crystal to the right, so hit that two. Leap up on the now-moved section of wall and use it to space jump to the next portion of the path.
Head forward and shoot the crystal in the watery room to lower it. Stand on the partially submerged block and space jump to the one you just lowered. Space jump again to get to the ledge. Continue forward until you reach an amber hologram door. Scan it to gain entry into the Torvus Bog. Don’t go through just yet. Instead, roll into the hole to the left of the door and scan the hologram you find for some Lore, then shoot the crystal to open a shortcut you’ll need later. Head back outside and go through the hex door. Go down the path and blast the locked door with a missile. Step through and activate the elevator then ride it down to the Bog.
Light Aether:Torvus Bog
When you get to the Bog, go through the hex door, fight through the waves of creatures and make your way out to Torvus Lagoon. Scan the corpse here for some Lore and the blue pods for some Research. Watch out for the creatures that rise up out of the water–these are Shredders. Scan them and sort them out with some missiles. Hop up on the jutting ledge on the left side of the level and blast through the locked door to find a Save Location.
Once you’ve saved, plop into the water and look for the dark door (use the map to find it). Once through, take down the swarm of Shredders and roll under the contraption blocking your path. Move to the underwater ledge ahead and leap up to it. Hop over to the next underwater platform and use this to get to the hex door ahead. Go through to get to the Great Bridge. Several Shriekers are in here, and they will phase in and out of view. Blast them quickly as they appear.
Find the locked door (marked red on the map) and blast it with a missile to gain entry. Turn into the morph ball, roll forward and bomb jump up to the metal ledge. Roll to the left and continue through the next room (you’ll see a portal here) until you stop. Go through the hex door here to find the bridge gate. Scan the console to extend a semi-circular bridge around the large tree. Go around it and use your Light Beam on the door to move on.
The next area is the Ruined Alcove. Wade through the shallow water and continue to the light door. The next area is Forgotten Bridge. This zone is home to a pair of nasty Grenchlers. Make sure you scan them, then get to the business of smiting them handily. You can’t hurt them anywhere but from behind, so the best way to beat them is to lock on and use the B double-tap to strafe around them and pepper them with cannon fire or missiles.
When the Grenchlers are dead, use the circular platforms that are partially submerged in the water to space jump across and make it toa far ledge. From here, head across the bent bridge that crosses to the portal. Hit it with a Dark Beam to activate it and step through.
Dark Aether:Torvus Bog
Once you’re in the Dark, activate the beacon on the bridge, and move through the Safe Zone across the bridge to a bomb slot on the other side. This will rotate the bridge in this realm and that of the Light world.
Drop down to the lower level and shoot the large creature in the water to flip it over (and create a handy Safe Zone). Leap to it and use it as a stepping stool to get up to the opposite edge. Use the mushrooms there to get up to the portal. Use the Light Beam on it and step through to return to Light Aether.
Light Aether:Torvus Bog
Now that the bridge has been turned, you can get across to new areas. However, first you’ll have to survive two Dark Pirate Commandos. Use your Dark Beam and missiles to make short work of them then get across that newly-turned bridge. At the end of it you’ll find a MissileExpansion.
Drop into the water and look for the Sporb on the wall. Scan it and return above. Turn into the morph ball and roll between the two tubular lights and along the groove on the right wall (facing the water). As you roll, the Sporb will attack. If it latches onto you, drop down and kill it before moving on. As you roll left, you’ll see a few stairs. Use bomb jumps to get up them. When you plop out of the chute, roll into the nearby ball tunnel and out the other side. Drop into the watery area below.
If you need to get back to the previous room, move to the piston on the right side of the path. In ball form, roll into the chamber and ride it up to another series of steps. There is another Sporb you’ll need to deal with here, so sort it out before continuing. Otherwise, just go through the light door and shoot it to continue to the Great Bridge. Scan the console near the ledge to activate the kinetic orb cannon on the other side of the area.
Head over to the cannon and roll into a ball. The cannon will propel you across the level to a bridge that leads across the area. Cross it and blast the dark door on the other side. Turn into a ball and roll across the bridge. As you move forward, you’ll see a red-rimmed hole with smoke coming out of it. Bomb it to gain an Energy Tank. Roll through the apparatus to the right and go through the hex door to find yourself back near the kinetic ball cannon. Repeat the process and head past the hole you just bombed.
Continue to the dark door and blast through. You will emerge in the Torvus Temple and have a nasty battle on your hands. First, two Aerotroopers and a regular Pirate will come at you. Drop them with charged Dark Beam attacks. Once they go down, a skiff with four Pirates will show up. Use the same tactics.
Get Super Missile
When all of the enemies die, the protective shield over the Super Missile will fall away. Go grab it! Get on the elavtor hologram and ride it to the top of this area. Use a super missile on the green door (press and hold A then press Y) to gain access to a rotating bomb slot room. Bomb the slot to spin the room and proceed out to the Torvus Energy Controller. Scan the green hologram to see a projection of A-Voq. He will tell you thatagain you will need to collect Keys to enter the Dark Temple. After healing you and granting the power to scan green holograms, the image will fade. Make sure you scan the nearby emerald for some Lore then head back to the Great Bridge.
Scan the green hologram door near the kinetic ball cannon and go through the next hex door to find the Map. Go back to Torvus Temple and scan the green hologram at the center of the area. This will drop you down a level. Collect power-ups by shooting the vegetation then scan the emerald hologram to drop the door. Move through to the Underground Tunnel. At the beginning of this area, turn into the morph ball and roll under the grate to secure a Missile Expansion.
Roll down the path and under a half-shut door to emerge into a watery area. Take down the Sporbs here and go to the next room, scanning the emerald hologram for some Lore. Go through the light door and into Torvus Grove. As you move toward the far door, it will be sealed off and two Pirate Commandos will drop in. Finish them off quickly with some Dark Beam blasts and the door will become accessible again. Go through it.

Scan the apparatus here to turn on the portal and step through to Dark Aether.
Part 9
Dark Aether:Torvus Bog
Go through the door and into the Polluted Mire. Steer clear of the dank water as you battle the Hunter Ing. Instead of trying to battle these creatures straight up, shoot the Safe Zone beacons to energize those zones when the Ing are near, and this will vaporize them.
Once the Ing is down, head to the lowest of the mushrooms (it’s to the right facing away from the door where you entered) and leap up the various mushrooms as you make your way to the top of this area. When you reach the ledge with a dark door on it, leap over there and head inside to find a Save Location. Once you use it, head out the opposite door to Dark Falls and go through the hex door to reach Dark Forgotten Bridge.
Battle through the creatures as you head down the left path and blast through a light door. This will lead to a morph ball tunnel–the Dark Arena Tunnel. As you roll through, the floor will collapse beneath you. Roll to the left and bomb through the overhead blocks then bomb jump up to rejoin the tunnel to the left. Emerge in the next room and drop to the area below. Scoot through the tunnel ahead for a boss fight.
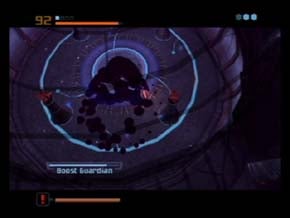
Boss:Boost Guardian
Remember to scan right away! The Boost Guardian is a bit like a Warrior Ing. Simply keep your distance, lock onto it and strafe or dash away from its attacks and use charged Light Beam attacks and missilesto chew through its health quickly.
After this stage, the Guardian will change into a morph ball and begin zipping around the room. It’s a good idea to change to a ball yourself at this point and avoid its attacks that way. Try to get it to hit into the energy pillars in the arena, as these will cough up health when destroyed. A good tactic is to stay up close to the beam to shield yourself from the ball attack, which will also put you in a good position to retrieve any health that arises.
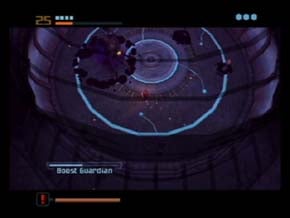
Whenthe Boost Guardian turns into a puddle during the fight, roll around and plant bombs around the perimeter of the puddle to try to make it revert to its original form. It will also spawn Inglets at this point, so lay bombs next to them to end them quickly, and be sure to scoop up any of the powerups they leave.

Get Boost Ball
When the Boost Guardian returns to its normal form, repeat the process. Remember… when there is a cut scene of the creature reverting back to its main form, you will be standing up and facing it no matter what form you were previously in. So don’t press the X button! After the boss falls, grab the Boost Ball and get out of here.
Go back to the half pipe in the previous room. Turn into the morph ball and charge up using B. Push toward the side of the halfpipe and let the boost go to gain momentum up the side of the curved surface, and roll up the other side and boost. Your goal is the Dark TempleKey imbedded in the left wall. Once you have it, roll up the right side to the ledge and exit the room. On the way back, use the boost to get across the collapsing blocks under the partial tunnel. Return to the save location. Head back to the portal in Gloom Vista and activate it and step through to the Light world.
Light Aether:Torvus Bog
Once you’re back in the world of Light, move to the opposite end of Torvus Grove and find the halfpipe. Use the boost ball to scoot up the right side to the ledge above and move clockwise around the room until you reach a dark door. Shoot it and step inside.
Follow the narrow path back past a waterfall area. Right before a dark door, you’ll encounter a new enemy–the Krocuss. Scan it and move into the dark door. Inside, you’ll find a spinner. Drop the enemy in the room, scan the spinner for some Researchand turn into morph ball form. Roll into the spinner and use the boost ball power to drop the nearby door.
Go through the opening you created into the Forgotten Bridge area and go through the Ruined Alcove, Torvus Lagoon, Temple Transport Acces and ride the elevator up to the Temple Grounds.
Light Aether:Temple Grounds
When you get back to the Temple Grounds, go to the Path of Eyes. Just to the right of the entrance is a morph ball hole. Roll into it and follow the path back to find a locked green door. Use a Super Missile burst to drop the lock and head through.
You’ll be back in the portal chamber. Don’t use the portal, however. Instead, drop to the floor below and head to the Meeting Grounds. Once there, find the halfpipe and use your boost ball to get up to the right side of the pipe. Go into the morph ball hole here and move carefully. When the camera view changes (to the sideview), you’ll notice a bunch of breakaway bricks to the right. Charge up your boost and speed across the crumbling blocks to reach the other side.
Get Seeker Launcher
Continue rolling, using bomb jumps to get to higher ledges on your journey. Soon, you’ll reach some tracks and continue to roll. When you finally drop out of the tunnels, you’ll find yourself in the Hall of Honored Dead. The Seeker Launcher is at the center of the area, but it’s protected by a force field. In order to get at it, you’ll need to use the spinners around the perimeter in this order: purple, blue, yellow, red. You’ll have to boost three times per spinner in order to turn that section of lock beige (and three more times if the wrong ring changes color). The idea is to get the rings to turn beige from the outside in.
When all of the rings are beige, the temple will activate and give you access to the launcher. Grab it. This missile launcher will allow you to hit multiple targets with missiles or the same target with multiple missiles. Press and hold Y to charge the Seeker. Move the targeting reticule over targets to lock on. Now go to the locked purple door and use your new Seeker on the locks surrounding the door.
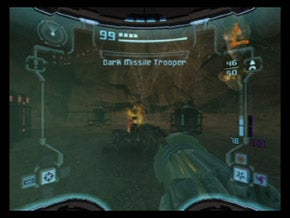
Step into the tunnel and move down the Path of Honor back to the Landing Site, scanning the corpse on the way back to collect some Lore. Save and replenish yourself at your ship and move to the violet doors in the ensuing passages. Through here you’ll reach the Hive Transport Area. Go down the elevator here and fight through to Hive Chamber A. If you haven’t already, kill the Dark Missile Trooper here to snag a Missile Expansion.
Also be sure to stop by Hive Chamber B. Next to one morph ball hole is another that can be cracked open with a morph ball bomb (again, if you haven’t already). Use it and roll inside to claim another Missile Expansion.
Now that you have the expansions, backtrack to the Service Access via the Landing Area (you’ll need to hit the purple crystal with a Light Beam to create a jumping platform to the higher ledge). In Service Access, go through the morph ball hole in the lower portion of the room, roll through the tunnels, use bomb jumps in the broken tunnels that follow and blast the green locked door with a Super Missile barrage to regain access to the Meeting Grounds. Track back to the Torvus Transport Access and return to the Torvus Bog.
Light Aether:Torvus Bog
Once back in the Bog, make your way back to the Torvus Temple and take the elevator down. See the circular portal on the wall? Hop up there and turn into morph ball form to roll down to a Super Missile door. Blast it and head through. Scan the console in thenext room to activate the elevator. Step on the hologram to take it down and go through the hex door to get to the Hydrodynamo Station.
Use the platforms rotating around the central column to get up to the locked door on the ledge above. Missile blast it to get to a Save Location. After you’ve saved, step off the ledge and into the watery area below. There is a large Blogg swimming around down there, so be sure to scan it before disposing of it. If you fall all the way to the bottom of the room, you can use the yellow-striped channels in the wall to get up to ledges that will allow you to jump over to the central platform. From here, head out across the narrow bridge that leads to a console. Scan it (you have to scan it from behind, not from the main platform). Doing so will unlock one of three locks and make a higher platform appear. Head to the central platform and enter the kinetic ball cannon. This will shoot you back up to the top of the room.

Drop back down into the water to the higher platform and jump over to the purple locked door. Grab the Missile Expansion here and use the seeker launcher on the door to unlock the door. Move through the watery tunnel that follows and emerge into the Training Chamber. You will see another short cut scene involving Dark Samus, but will not have to fight her now.
Instead, splash down and deliver a missile to the maw of each of the Bloggs here. Once they die, you’ll be shown a nearby spinner. Roll inside it and use boost to turn the floor so that the red neon portions line up. Drop into the circular cutout on the floor and turn into morph ball. Roll through the channel here to get to the other side of the room, where you’ll find a dark door.
Turn into the morph ball and roll to the bubbling current that leads up to the next hole. From here, you’ll be shot through tubes on a jet of water. When you regain control, roll right until you reach tubes that let you drift up. Keep heading right to get propelled on, eventually coming to rest. Step through the next door to get to the Catacombs. Look on the map and check to see where the dark door is. Drop into the water and make your way in that direction, looking for a foothold to get to the surface.
Before going through the door, be sure to scan the nearby corpse to grab some Lore. Head through the dark door to move back through to the Hydrodynamo Station. When you emerge, scan the console to unlock the second lock and move another platform. Save if you want to and go back to the Training Chamber. Drop into the water, slay the Bloggs there and use the spinner to line up the blue neon sections of floor. As with the red, drop into the circular portion and roll in the channel under the grating to get to the opposite side of the room. Head through the light door there.
Once inside, roll forward to the bubbles to go into the bomb slot, which will shoot you through several watery tubes. When you regain control, roll to the left until you reach a blue section of floor. Drop a bomb there to get to the lower region then head left to get in the bomb slot. Drop an explosive in there and the flow going through the tubes will change. Float up and head to the left until you reach a tube that shoots you over to dry land.
Through the next doorway is the Gathering Hall. Splashdown into the murky water and shoot the spike-backed objects from below with the Dark Beam to flip them over. Use the underwater platforms to get back to dry land and head across the room. Drop under once more to flip the other spiky platform, and be sure to scan the underwater hologram to get some Lore. Now head all the way across the room and find the bomb slot, hop up to it and drop a bomb to open an underwater gate. Swim down there and go through. The passage leads to a portal. Shoot it with the Dark Beam and step inside to go to the Dark world.
Part 10
Dark Aether:Torvus Bog
When you arrive in the Dark Torvus Bog, the water in the room will be gone, but there will be cloaked Pirates. Take them down with missiles and Light Beam blasts the hop up to the platform with the laser on it. Turn into a morph ball and roll into the spinner. Boost it three times and the laser will trace against the wall, changing position. When you see the short cut scene, head to the portal, turn it light and go back through.
Light Aether:Torvus Bog
You’ll have to flip the spiky platforms over again when you return. Do that and return to solid ground, heading over to the kinetic ball cannon that is now usable. Roll into it to get shot to a light door at the top of the room.
Continue down the next watery passage to re-emerge into the Hydrodynamo Station. Scan the console here to unlock the final bit. Drop to the bottom of the area and go through the hex door there.
Get Gravity Boost
Go all the way down to the bottom of this area, taking the large steps down until you reach another hex door. Go through that to enter the Main Hydrochamber. Drop to the bottom of it and find the room attached to it to gain the Gravity Boost. This will allow you to jump underwater by pressing B. Holding B after pressing it twicewill allow you to slowly rise while in the water. Head out the door to find yourself in a boss fight.
Boss:Alpha Blogg
The Alpha Blogg can be a tricky kill, primarily because the fight requires impeccable timing. Move to the opposite side of the arena and lock onto the beast. Sometimes it will send jets of bubbles in your direction, and you’ll want to dodge those, or you’ll be temporarily blinded.
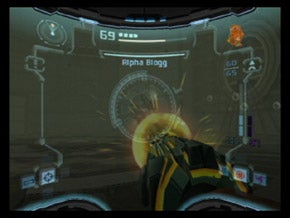
What you want to do is charge up your weapon and wait for the Blogg to charge. Just as it’s almost on top of you, release a Super Missile into its maw to chew through a chunk of health quickly. As you’re letting the attack go, use tap B repeatedly and press to the right or left to scoot out of the way. As the beast recovers, move to the other end of the arena and repeat the process. If you run out of missile, a Dark Beam (charged) will also work nicely.
When the fight concludes, find the circular fan hole in the wall and use your new gravity boost to get up to it. From there jump up to the ledge jutting out of the wall on the left. Finally, use the boost to get all the way across the room and exit through the hex door there. It’s a good idea to backtrack to the Hydrodynamo Station and use the save location there. Return to the Hydrodynamo Shaft and find the rotating pillar pictured below. Use the boost to get up on top of it and find a portal. Hit it with a Dark Beam and step through.
Dark Aether:Torvus Bog
When you arrive, you’ll find a Dark Temple Key. Grab it and return to the Light world.
Light Aether:Torvus Bog
Go back to the Catacombs via the dark door in the Hydrodynamo Station. When you get there, drop into the water and find the bomb slot that’s set in the wall. This will drop the barrier surrounding this room’s portal. Return to the surface and hop up to the platform with the portal on it. Scan the hologram above it then hit the portal with a Dark Beam blast and step in it.
Dark Aether:Torvus Bog
As if the Grenchlers in the Light world weren’t bad enough, they have cousins in the Dark realm. Make sure you scan one of them then use the lock on and dash around them to hit each with a Light Beam attack from behind. When both of them fall, head for the only hex door in the room.
Move to the bomb cannon andmorph ball jump to it and you’ll be shot into a series of tubes. Watch out for the pistons that come down as you roll through to the left. When you come to rest, use a Dark Beam on the door toget through to the Sacrificial Chamber. Kill or avoid the Hunter Ing on your way to the opposite end of the room. Blast through the light door there and get in the ball cannon.
When you arrive, roll to the left, falling through holesuntil you reach the bottom of three pipes. Roll all the way to the left and bomb jump up and to the left then one more time. Continue bomb jumping as you work to the left and get to the tube there. This will propel you to a door that leads to the Crypt.
Use a Dark Beam blast on the crystal straight ahead to drop the forcefield and extend a number of platforms around the room. Blast the Pirates in the room and begin space jumping between the platforms, starting to the right. Some of the ledges move in and out, so time your jumps accordingly. Your ultimate goal is the light door at the top of the room. Once through there, use Light Beam blasts on the Tentacles in the next hallway to make your way to Undertemple Shaft. Drop down into the room and take out the Hunter Ing. Then use the side ledges to jump to the center apparatus and get inside the kinetic ball cannon there. This will rocket you to the top of the room. Jump across to the locked door and use a missile to blast it open. Use the Save Location inside.
Return to the platform that you ended up on when you were launched by the ball cannon. Drop off of it to reach the level below and look for a Safe Zone to drop into. From here, move inside the metal structure and and use the bomb slot on the central pillar to turn the metal structure and allow you access to a new door. Use the Ingsphere Caches in the next corridor to plump up health and weapons and get ready for another boss fight.
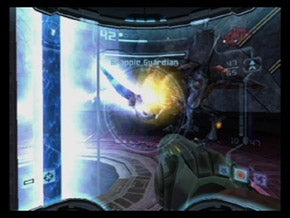
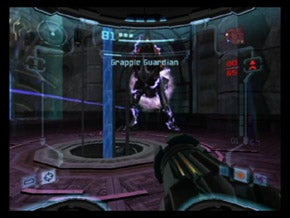
Boss:Grapple Guardian
Be sure to scan the Grapple Guardian right off the bat to expose its weakness–the single eye. The Guardian looks like a mega-Dark Grenchler, and is vulnerable in the same location. Stay in the safety of the white-lit pillar regions and shoot at the Guardian’s eye. It doesn’t like that much, and will shoot a grapple beam at you.
When this happens, make sure you’re standing behind one of the pillars, as the beam will latch onto it. This will give you an opportunity to run around behind the boss and use a Super Missile on its tail. Make sure you don’t linger too long, though. You don’t want the nasty bastard to swing around and get you with its snout. Keep repeating this process, or use a more derring-do approach. You can also use charged-up eye shots to stun the beast then quickly dash around behind and hit it with Super Missiles. Whatever works for you.
Get Grapple Beam
When you whittle the boss down to about 1/8 of its health, the pillars will explode and you’ll be on your own with the tailless freak.The main idea here is to avoid its attacks. Keep your distance. It will try to hit you with the grapple beam, which will do a lot of damage. Avoid that and stay on the move when it charges. Shoot it in the face with charged beam shots until it comes to a stop. When it does, it will be momentarily vulnerable.Shoot it quickly with whatever you can to whittle down the remainder of its health.Doing so will yield the Grapple Beam.
The room will drop, so make your way to the pile of ruins near the back, climb up it and face the center of the room. From here, use the Grapple Beam by pressing L and swing across to the far platform. Go through the hex door to trace your path back to Undertemple Shaft. As you emerge into the room, look right for a grapple point. Use it to get over to the ledge with a light door on it.
Battle through tentacles in the next passage as you make your way to the Crypt. Go to the bottom of the room and use the portal to head back to the Light world.
Part 11
Light Aether:Torvus Bog
Head back to the Hydrodynamo Station and save.Take the elevator attached to this chamber back upto find yourself in thelower section of Torvus Temple. Look for the purple doorway grown overwith woody roots. Rol in there and useSeeker Missiles on thenodes surrounding the door to unlock it.Scan the console in the next room to activate an elevator that will take you to the Agon Wastes.
Light Aether:Agon Wastes
Use the Seeker Missiles on the door above and step through. Use the map to navigate back to the Agon Temple. Go through the Transport Center, Portal Terminal, Portal Access A, Mining Station A. and Temple Access to get there.Upon entering the Temple, hang a left and find the dark door and head through. Roll into the morph ball hole here and the camera will switch to a side view.
Roll to the left, avoiding the enemies. You’ll come to another purple door… Seeker Missile it and go through to reach Mining Station B. Walk down and scan the console in the sands to activate a kinetic ball cannon. You’ll need that to get back up to the higher ledge later. For now, head across the area and activate the bomb slot to turn on a large fan.
Once that’s done, go inside the open doorway (it looks like ribs are sticking out of the sand around it). You’ll find another console at the base of a halfpipe. Scan it to turn on another orb cannon. Roll into it and scan the hologram on the ledge you land on to score some Lore. Continue to find another bomb slot. Activate it quickly (you have to do it quickly before the fan stops spinning–or you’ll need to repeat the previous step) and you will raise the fan and chip away a portion of rock, exposing a new portal.
Return to the halfpipe and boost up the side of it to reach a ledge. Follow that to a set of tracks that will ultimately deposit you on a bridge near the portal. Blast it with the Dark Beam and enter to head to Dark Aether.
Dark Aether:Agon Wastes
Once in the Dark world, roll through the crack near the downed Luminoth. In the next room, jump up to a sandy ledge and follow the Safe Zones up until you overlook the room you were just in. Look to the left and shoot the light there to activate another Zone. Space jump over to that ledge. Hop over one more ledge to the left and go through the hex door to get to Dark Transit Station.
Roll through until you fall out of the tunnel and exit via the nearby hex door. This will bring you to another portal. Activate it and go through to the Light world.
Get Darkburst
In the Light world, move to the same tunnel you took across and boost back across it until you reach a hex door. Go through to gain the Dark Burst. This powerful attack uses 5 missiles! Using the Dark Beam, press and hold A to charge, then press Y to fire.
Drop to the lower section of Mining Station B. Use the kinetic ball cannon where you originally came into the area to get to the higher ledge. Go back through the Mine Shaft, using bomb jumps as you work your way to the right. Exit to the Temple then make your way through Temple Access, Portlal Access A, Portal Terminal, and Transport Center. Use the halfpipe there to get back to the elevator that will take you to the Bog.
Light Aether:Torvus Bog
Return to the Great Bridgeand double jumpover to the ledge with the light door and go through to reach the Abandoned Worksite. Look up to find a grapple point and use the Grapple Beam to swing to the far ledge. Once there, turn around and grapple again, swinging back to the opposite ledge to get a Missile Expansion.
Swing back across the gap and go down the morph ball tunnel. Continue on to Forgotten Bridge. Move to the center of the bridge, hop up to the half-circle metal ledge and use that to leap through the waterfall to the portal. Turn it dark and step through.
Dark Aether:Torvus Bog
Back in the dark, head to the bridge and follow it to the green locked door. Shoot it with a Super Missile to get through and head forward. Use a Light Beam on the Liftvine Crystal (and scan it). This will raise it out of the muck and provide a handy Safe Zone, to boot.
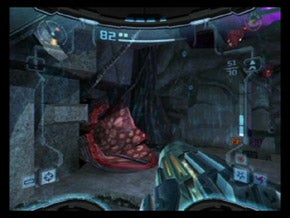
Get on it and jump to the higher ledge. Change into the morph ball and roll into the tunnel. When you emerge, shoot the Liftvine below, jump to it and leap to the far bank. Head through the hex door nearby to find the room that contains the final key. Roll through the red tunnel to the left out to a ledge. Use the grapple point to swing over and claim the Dark Temple Key.
Once you have it, drop to the bottom of this area and go through the dark door. Inside the Portal Chamber, turn into the morph ball and bomb jump onto the metal ledge, roll through the next room. Before going out the door to the Poisoned Bog, jump up the ledges nearby and roll into morph ball form to get through the little notch in the wall. Activate the portal below to transport momentarily to the Light world to get a Missile Expansion. Return through the portal and proceed to Poisoned Bog.
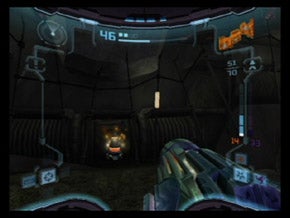
From here, go through the purple door using the seeker launcher and find a Beam Ammo Expansion in Cache A. Go back to Venomous Pond and through the red door to find a Save Location. Return to the previous room and go through the light door to reach the Dark Torvus Temple Access. Roll through the tunnel, bomb jumping when necessary, until you reach another light door.
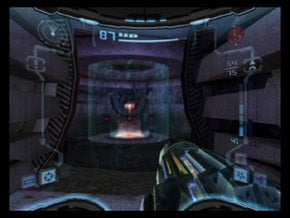
Through this is the Dark Torvus Temple. Go through the left hex door to find anAmmo Station, which will fully replenish your weapons. Hop up to the circular opening and follow the morph tunnel down to a green door, where you’ll locate a new Energy Tank. Once you have this stuff, head to the center of the Temple. Your three Keys will be taken and it’ll be time for another boss battle.
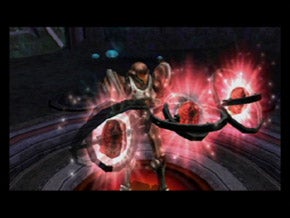
Boss:Chykka
This boss fight goes in several stages, so be sure to scan each of them and read what’s going on to give yourself an edge in this battle. Begin by targeting and shooting each of the nodes off of the coccoon. This will send the Chykka Larva into the bilious water.
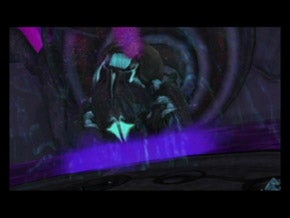
Larva
During the Larva segment of the fight, the creature will be submerged much of the time. Use the radar to track where it is and hit it with the Light Beam as it pokes up out of the murk. Make sure you quickly eliminate the Dark Shredders who appear in the arena. Use Dark Beam ammo on them to keep your Light Beam charged. When you feel the controller rumble, the Larva is about to leap out of the water. Use a charged Light shot as it surfaces (you can quickly lock on and let ‘er rip), but be sure to double jump when it lands, or you’ll take damage from the purple splashback. Sometimes, the beast will plop onto the side of the platform you’re on and try to lash at you with its tongue. This is your best opportunity to really mess it up. Hit the Larva with charged Light and missile attacks. Repeat until this phase is over.
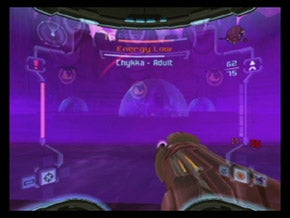
Adult
The next stage is against a flying insect form. Again, make sure you scan it before actually commencing the battle. The idea here is to stun the giant bug so you can circle around and knock its wings off. The best way to do this is to lock on and shoot your regular beam rapidly. When your see four circles appear behind the insect’s wings, grapple beam over to the next platform, lock on to one of the wings and hit it witha missile barrage to knock it off. Repeat until all four fall off. To play defense, watch out for when Chykka dips its tail into the slime. When it does this, start grappling and swinging around the arena until it stops slinging and spitting goo. Sometimes, the insect will fly at you. Just avoid it and wait for it to return to a familiar position to resume the fight.
Dark
Once you knock all four wings off of the Chykka, it will dip into the purple mire and re-emerge as a Dark Chykka. Watch out for the initial wave of muck that washes over the platform.As Dark Chykka, the boss’tail will become engorged with Chyklings, which she will launch out into the arena. Use Dark Beam ammo (or the Darkburst) to drop them and score health and Light ammo. Use charged up Light Beam blasts on it to whittle its health down quickly.
The Dark Chykka will still spit purple goo just like the last form, and will also charge the platform you’re on. Watch for it to hover and start flapping its wings rapidly–that’s the tell. Later in the fight, the platforms will also start to sink, so you’ll have to tool around with the grapple beam until they reappear. If you don’t kill the Dark form in your first go-around, you’ll have to duke it out with the Adult form again, knocking its wings off one by one. When the Chykka finally drops into the muck for good, you will earn the Dark Visor.Press right on the D-Pad to activate it.
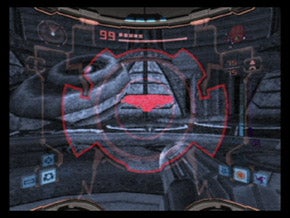
Get Dark Visor
You will put the Dark Visor to use immediately when a number of platforms appear then disappear. Switch on the visor and they will appear red. Hop platform to platform until you reach the top of this area. Go through the hex door and use the bomb slot to spin the room. Exit and head to the Energy Controller. As usual, plug in and transfer the energy to your arm cannon. Time to get back to the Torvus Energy Controller in the Light world. To do this, head back to the Dark Torvus Temple, take the elevator down and follow Dark Torvus Temple Access to the Brooding Ground to Dark Forgotten Bridge. Use the portal there to get back to the Light world.
Light Aether:Torvus Bog
Back in the Light realm, head through the Abandoned Worksite, Great Bridge, Temple Access to the Torvus Temple. Ride the elevators up to the bomb slot room, spin it and exit to the Torvus Energy Controller.
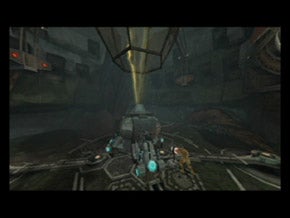
When the energy is restored, go back to the Torvus Temple, take the elevator down and navigate through Temple Access, Great Bridge, and Path of Roots. At Path of Roots, use your grapple beam to swing over to a Missile Expansion. Drop into the water and go through the dark door to get back to Torvus Lagoon. Go toward Temple Transport Access underwater to find another Missile Expansion.
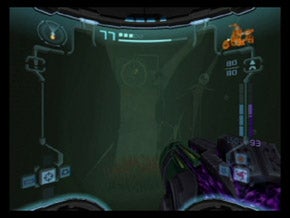
Once you have them, continue to Temple Transport Access and on to the elevator that will carry you up to the Temple Grounds.
Light Aether:Temple Grounds
Head through the Path of Eyes and blow the cover off the green door to reacha kinetic ball cannon.When you land after being shot, use the grapple point nearby to swing over to an Energy Tank.
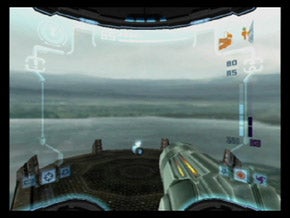
Return to the Path of Eyes and keep moving through to the Meeting Grounds to Temple Transport C. Take the elevator up and find U-Mos in the Great Temple.
Light Aether:Great Temple
Speak with U-Mos again and he’ll tell you that only one temple remains, and it’s inside a fortress. Great… a temple inside a fortress! Once U-Mos is done talking, head back down to the Temple Grounds.

In the Temple Sanctuary, scan the emerald door and go through the hex door there. See where all of the red things are flowing? Go there to find a Save Location. Turn into a morph ball in this room and use a bomb on the rocky rubble to get below, where you’ll find a Missile Expansion. Once you have it, save and head for Temple Transport A and ride the elevator.
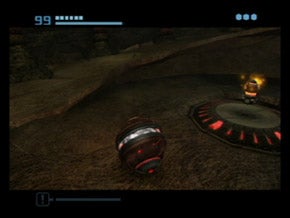
Light Aether:Temple Grounds
Head to the Sacred Bridge. Once there, roll into the ball cannon. On the ledge above, turn around and activate the Dark Visor. A display of red nodes will appear, so use the seeker launcher on them to open a doorway to the GFMC Compound.
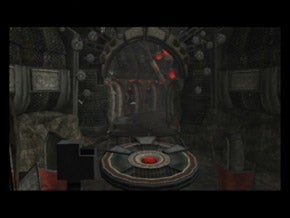
Slay the Pirates there then move to the emerald hologram door and scan it to open a path to the Fortress Transport Access. Use super missiles to take down the Turrets here (be sure to scan them, too). Scan the violet hologram near the hex door to get some Lore for your Logbook then move through the door. Scan the console in the next room to activate the elevator. This will transport you to Sanctuary Fortress.
Part 12
Light Aether:Sanctuary Fortress
When the elevator comes to rest, go through the hex door and head to the opposite end of the hall, dropping the Turrets there. Scan the console nearby to open the next hallway. Use the spinner at the end of the next corridor to open the door.
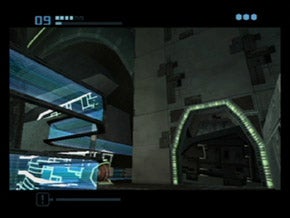
Through this passage is a bridge that leads to the fortress itself. Between you and the front door is a tough battle with a gang of Pirates. Use the crates for cover and work carefully down the bridge. Most of the Pirates have laser shields, so make sure those are down before you attack. Use the smaller crates to replenish your supplies as you go.
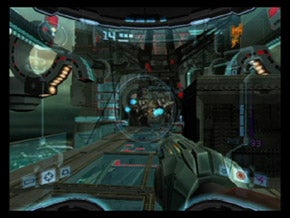
Once all the Pirates are dead, the door will be unlocked. Go insideand scan then kill the Octopedes. Make sure you aren’t too close when you shoot them, as they tend to explode. Continue to the next hex door and go through to Reactor Access. Switch to the Dark Visor and use it to find the red nodes ahead. Use the seeker launcher to send a missile burst to unlock a circular door. Scan the Rezbit that comes through. Shoot the curious new creature with your Dark Beam when its shield is lowered. If it nails youwith its most powerful attack, it will actually knock your systems offline, causing you to have to reboot (L+R+B).
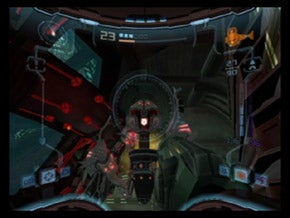
When you’re done with the Rezbit, hop up to the door that is now accessible. Inside the Reactor Core, you’ll encounter the first Quad, a nasty robot who will try to turn into a top and spin into you, causing lots of damage on impact. Before it turns into a top, lock on to its head and hit it with a Super Missile. Once this happens, change to morph ball form and boost into the top form. This will cause a red light to appear beneath the Quad. Boost through it to take the thing down.
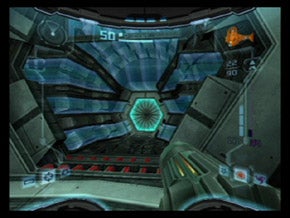
When it dies, head into the reactor and take down the Rezbits as you climb the room, leaping between the red-rimmed platforms. Once you get to the top, head through the hex door. Ahead, you’ll see a gyrosphere gone crazy.
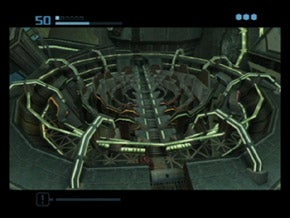
Turn into ball form and roll into the opening to the left, which will take you to a track that surrounds the gyrosphere. There are four bomb slots on this track, and they need to be bombed in this order: orange, blue, red and green. This will allow you to roll across the center channel. Keep rolling until you reach a hex door and go through.
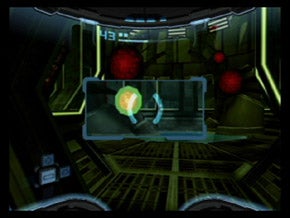
The next hall featuresmore Quads. Take out the heads first, or they will float away and take over the broken down bodies in the next section of room. Once you defeat them, head to the next room and activate the portal. Step through to go to the world of Dark.
Dark Aether:Ing Hive
When you arrive, move to the Culling Chamber and be sure to scan the Ingworm Cache for some Research. Continue to the dark door and move to Central Hive East Transport. Shoot the Ingworm Caches in this room before scanning the console to activate the elevator. When you get to the top floor, you can shoot more Ingworm Caches to gain health. Once you’re replenished, go through the dark door and continue until you see a swirling swarm of Nightbarbs. Take them all down then use the grapple beam to swing across the gap. When you get across, turn around and activate the Dark Visor. Target the red nodes across the way and let fly with a Seeker Missile burst to activate the nearby portal. Head to the Light world.
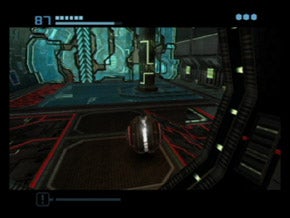
Light Aether:Sanctuary Fortress
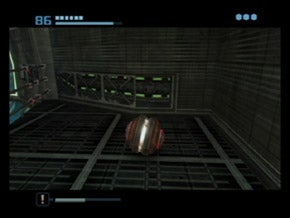
Go through the near dark door and scan the Diligence Class Drone then use the Dark Beam to take it down. In the next area, scan the Mechlops beneath the glass floor. Roll under the floor and plant bombs in the creature’s path and it will suck them into its mouth and explode. Don’t get caught, though, or you’ll get carried back to the ramp at the beginning.
Roll under the dividing wall and up the ramp on the other side. Continue to the dark door and head through to Dynamo Access. In this room, you’ll see another gyro to the right. Next to this is a spot that only a morph ball can fit into. Roll inside, bomb jump up and roll out to a balcony that overlooks the powerful machinery. Keep rolling to another hole in the wall.
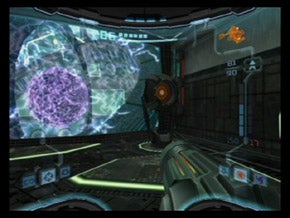
In the next room is a bomb slot. Activate it and a grid of colored circles will appear. The idea is to line them up in three rows: red on top, green in the middle and blue on the bottom. To change their orientation, shoot the white circles between the grids.When they’re lined up, a new bomb slot will activate. Bomb it to stop of the outer ring of the gyro. Be sure to use the Save Locationthrough the missile-locked door in this room.
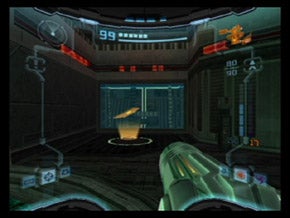
Return to the previous room, hop out onto the gyro’s outer ring and follow it around to the opposite balcony. Roll through the morph ball hole to a room with a spinner. Use the device to open a path to the original room. Don’t go there, though. Instead, scan the nearby console to activate the elevator here. Ride it up a level and go through the hex door to reach Temple Access. Drop to the area below and fight the Quad, taking down the legs first, then the head. When you defeat it, the hex door will unlock in this room.
The next room is the Sanctuary Temple. Drop to the bottom of this area to encounter a couple of Dark Quads. Be sure to scan both parts of them and take them down in the same way you do their light counterparts. When they fall, climb the metal walkways, using the grapple beam when necessary to get to the top. If you lost health during the fight, explode the metal boxes on your way up. On the final platform, you’ll need to swing on one grapple then catch the next in midair. Go through the hex door here and use the bomb slot to spin the room and access the Sanctuary Energy Controller.
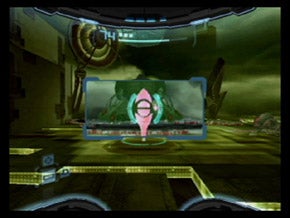
Scan the holoprojector to hear from another Luminoth, O-Lir. He’ll explain the fortress you’re in and grant you the ability to scan cobalt holograms. Be sure to scan the one in this area to record some Lore. Return to the Sanctuary Temple. There are Mekenobites here, so avoid the floor. Instead, grapple over to the center platform and then grapple to the cobalt holodoor and scan it to go through.
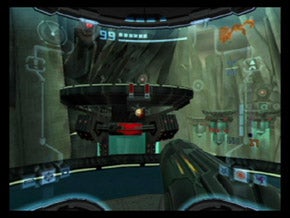
Outside on the Worker’s Path, hop across two platforms to reach the one that is slightly lower. Turn around and scan the node under the nearest platform to activate a kinetic orb cannon. Go to that platform and enter the cannon hologram to get launched across the map. Scan the node here, too to activate another cannon. Jump to the next platform and head through the hex door to find a morph ball tunnel. Pause here and switch to the scan visor. Wait for the Spider Guardian to show up and scan it as it trucksthrough the tunnels.This is your only opportunity for a scan. Once you get it, roll into the tunnel. Time for a boss battle.
Boss:Spider Guardian
This is a morph ball-only battle, so hopefully you’ve got mad skills with Samus’ spherical self. The idea here is to avoid the Spider Guardian, who casts a huge electrical field as it moves through the maze. At the same time, you have to find a way to injure it. The only way to do that is to redirect it into the blue electrical pylons. To do this, you need to activate the bomb slot (or slots in later stages). However, you can only do that when the Guardian is green. To change its color, you will have to bomb it. You must bomb the slot(s) while the boss is still green, and if you don’t it will revert to other colors, and you’ll need to turn it back.
Stage 1
The best way to complete this first part is to bomb jump up the left ledges quickly, staying all the way left to avoid the boss’ electrical field. Avoid the boss as you make your way all the way around to the right and pause at the left edge of the platform directly above the blue pylon (and near the bomb slot). As the boss approaches, lay a bomb, then roll away to the rightto avoid getting hit. Repeat this until the Guardian turns green. Once he does, bomb jump up to the bomb slot. Plant a bomb there to divert the path and force the boss through the pylon.
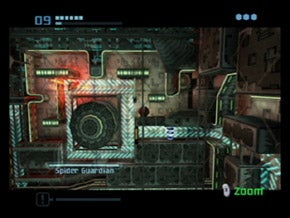
Stage 2
In this stage, you will drop into a half pipe. Use the boost to get up on top of the platform on the right side of the halfpipe. As the boss is midway down the left side of the turn nearest you, drop and lay some bombs and he should move into them. Fall to the pipe below and wait for the Guardian to pass then boost back to repeat the process. Or, if the boss turns green, boost up the left side to the top platform, wait for an opportune moment and bomb jump up to the slot and bomb it to divert its path.

Stage 3
This is another halfpipe stage. Boost up to get on top of the maze and wait at the edge of the gap in the platforms. As the boss approaches from the left, drop between and lay bombs as you fall below. Turn it green and return to the top, rolling down to the bomb slot. Jump up and in and lay a bomb to divert the path yet again.
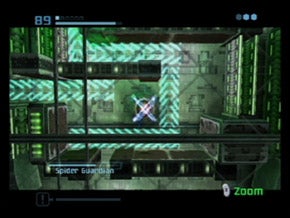
Stage 4
As you’re rolling to face your destiny, explode the crates in the next area to get some extra health. There are a total of three bomb slots in this segment of the challenge, and it’s the toughest one of all. For starters, go all the way down to the bottom of the area and wait at the gap between the platforms. Lay a bomb as the boss approaches, then boost away. When it’s stunned, boost through it and wait for it to come back. Lay a bomb, boost through, etc. When the Guardian turns green, bomb jump between the gap and roll to the first bomb slot. Make sure the boss is on the right side of the arena when you do this, because if it hits the gate when green, it will simply dissolve.
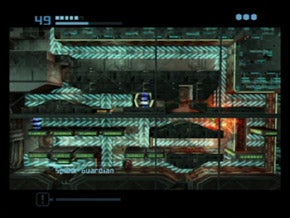
Once you have bombed the first slot, go back down to the bottom and resume your bombing and boosting through the stunned boss. When it turns green again, rush back to the first bomb slot, activate it, then boost to the right across the gap, bomb jump up to the higher ledge, roll to the right and bomb jump up to the next slot. Make sure the boss hits the second pylon.

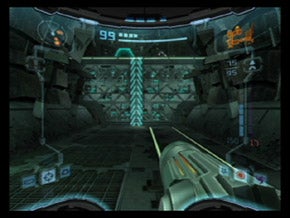
Get Spider Ball
When the second one’s been hit, return below and make the boss turn greenon the far right, boost all the way to the left and bomb the first two slots. When you land from the second bombing, boost left across the gap and up the slope to the third slot. Bomb the slot when the boss is still green to divert the path. When it hits the third pylon, the fight will conclude. Make your way up to the top of the arena and claim the Spider Ball. Now that you have it, you can travel on the cross-hatched tracks that run everywhere by pressing R.
Return to the arena and use the spider ball to get up to the top of the area, where you’ll find a Missile Expansion. Grab it and roll into the morph ball tunnel and down to the room below. Head up the spider ball track ahead and scan the Luminoth corpse there for some Lore. Go through the hex door to Central Area Transport East. Go down the elevator here. Once below, scan the cobalt hologram for some Lore. Go up the spider tracks here to drop into the Hall of Combat Mastery.
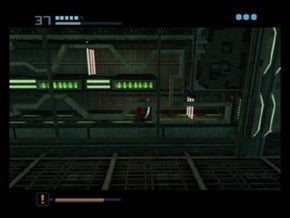
Once there, spider ball up the nearby wall and bomb jump up and over to the bomb slot. This will unlock the path to the right. Roll over there, avoiding the jets of flame as you move right. In the next segment, watch out for lasers slicing back and forth. They won’t hurt you that much if you run into them, but be careful nonetheless. The next section of this deathtrap is a series of moving platforms that you must bomb jump between. To make matters worse, two banks of lasers often cut across the chamber, so you’ll have to time your jumps to miss them.
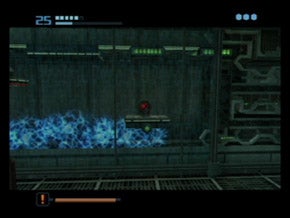
The next bit forces you to traverse another moving platform room, but this time you cannot touch the blue section of the floor, or you’ll get damaged. Bomb jump up the first platform, then bomb jump under the second and use the spider ball to cling onto it. When you reach the left side, drop down to the small platform and ride it to the left. Bomb jump up to the spider ball track leading up. Follow it to the right and roll until you reach another spider ball track, this one on the ceiling. Move across it to another contraption on the other side of the room. Roll through it to find a Missile Expansion.
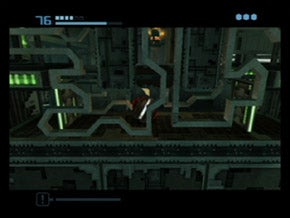
Whew! Once you have that, go to the Minigyro Chamber and then to the Reactor Core. Use the kinetic ball cannon on the floor to launch to the central reactor. When you hit one of the spheres, stick to it and roll up the spider tracks to a second sphere. Find the red node on it and boost to go over to another sphere. Repeat this process, boosting from sphere to sphere until you reach an Energy Tank.If you hit any electricity on the way up, you’ll get knocked off and have to start over.
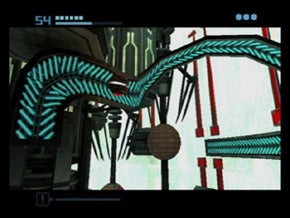
Go outside and to the missile door nearby to find a Save Location. Return to Reactor core and head around the center part of the room to find a cobalt door. Scan it and go through the hex door to get the Map for this area. Head through Reactor Access to the Sanctuary Entrance. Here, you’ll have another encounter with Dark Samus. She’ll wreck the bridge, so you’ll have to find another way across.
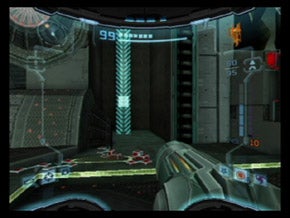
Look for the spider track behind you and cling to it, following it to a curlicue section of track. Boost to it, roll to to very tip of the curled edge and use the boost to jump to the other side. Continue to roll back to the other side of the chasm. Follow the path back to the elevator and take it to the Temple Grounds.
Now it’s time to navigate all the way back to Torvus Bog. Return to the Great Temple and take Temple Transport C to the Meeting Grounds and follow that through the Path of Eyes to Torvus Transport Acces andd down to the Bog.
Part 13
Light Aether:Torvus Bog
Once you get to the Bog, head back to the Hydrodynamo Station. Go Temple Transport Access, Torvus Lagoon, Portal Chamber, GreatBridge, Temple Access, Torvus Temple. Use the red-lined morph ball tunnel to roll to Underground Transport. Go through the Hydrodynamo Station and fall to the bottom. Go through the hex door here to reach the Main Hydrochamber. Once there, go through the open rectangular passage and find the spider ball track. Roll up it to a portal, activate it and step through to the Dark realm.
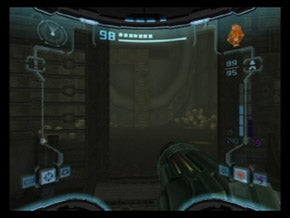
Dark Aether:Torvus Bog
Step off the ledge in the Dark world to trigger a boss fight.
Boss:Power Bomb Guardian
Now that you are used to the spider ball’s powers, it’s time to put your skills to the test against a new boss. There are unconnected spider ball tracks all over the walls, andyou’ll have to work all the way to the outskirts of the arenain order to activate a series of bomb slots, four in all.
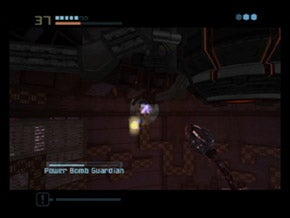
Throughout the battle, the boss will try to knock you off the wall by tossing Power Bombs at you. Wait until they explode, and be sure to roll away from them, as there is a significant blast radius when they go off. There are also Inglets crawling all over the walls, so you’ll have to dodge those, too.
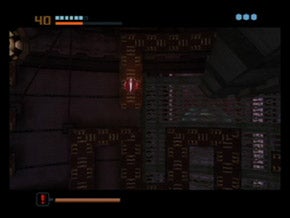
Use bombs to jump up a track, and release, then re-push the R button if you need to drop a track. Start with the outer bomb slots first, then do the inside ones for the easiest path through. Once you bomb all four slots, the fight will conclude. If you need health, kill the Inglets at the bottom of the area to score some.
Get Power Bomb
Once the fight is over, get back on the spider ball track and head up to the top of the arena, dropping onto the bridge and claiming the Power Bomb. When you have it, continue to the yellow locked door and use a Power Bomb on it to access a new area. Climb the stairs, using missiles on the tentacles to shrink them back. Use a power bomb on the yellow door to get through to the Undertemple Shaft. Go use the save location there and continue to the light door (using the grapple beam)in the Shaft and follow it to the Crypt. Use the portal there to return to the Light.
Light Aether:Torvus Bog
When you arrive back in the Light world, you’ll find yourself in the watery Gathering Hall. Head straight foward and use a Power Bomb on the cracked glass floor. This will partially drain the room. Put another Power Bomb on the drain plug to finish draining the room.
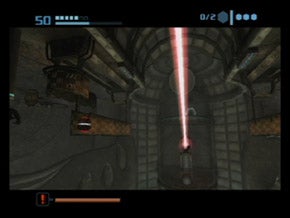
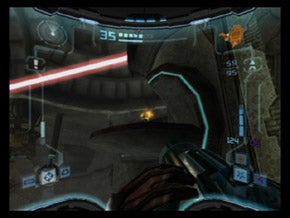
When this is done, use the halfpipe that you’ve created to launch up to a spider ball track. Follow it around to a rotating piece of track and boost over to it. From here, boost to a bomb slot and activate it. Repeat the process on the other side of the room to make the shield around the Missile Expansion drop. Use the grapple beam to swing to the platform nearby and hop up to claim the power-up.
Use the kinetic ball cannon to get back up to the light door and head through then make your way back to Torvus Temple. From here, move back to the Transport to Temple Grounds.
Light Aether:Temple Grounds
On your way through the Path of Eyes, look for the door at the hairpin turn that leads to the Windchamber Gateway. If you’ve been following this walkthrough, you will already have been through here to collect some power-ups. Use the kinetic ball cannon to shoot yourself across the gap, and be sure to snag the energy tank if you haven’t already. Use a power bomb to bust through the yellow door. Take down the Pirates here and move to the portal on the right side of the area to go into the Dark realm.
Dark Aether:Sky Temple Grounds
In the Dark realm, use the spinner nearby, turning the lock until it is beige. Use thekinetic ball cannon to blast over to a platform where you’ll find another spinner. Again, use it to rotate one of the circular locks on the column across the way. Keep moving around, making all of the locks beige. When it’s done, use your Seeker Missile on the purple nodes.
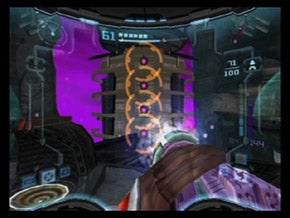
A short cut scene will play when the first missile barrage finds its target. Now, repeat the same process with the spinners, this time turning all of the locks blue. When that’s done, target the nodes again and let fly with a missile blast. Return to the Light realm.
Light Aether:Temple Grounds
When you get back, there will be grapple points where you lowered the lock arms. Grapple over to the platform with a ball cannon on it and use it to launch yourself up to grab the Sunburst. Like the Darkburst, this uses energy plus five missiles.
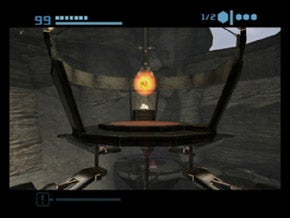
Once you have the Sunburst, you’ll have to battle some Dark Pirates in order to unlock the doors. Once you defeat them, head through the hex door opposite of where you came in and roll through the WindchamberTunnelto get back to the GFMC Compound. Use a Power Bomb on the yellow doorto get through. Head back to the Sanctuary Fortress.
Part 14
Light Aether:Sanctuary Fortress
Go backacross the bridge using the spiderball track and re-enter the Fortress. Make your way to the Reactor Access and be sure to scan the Ingsmasher who now comes to life.
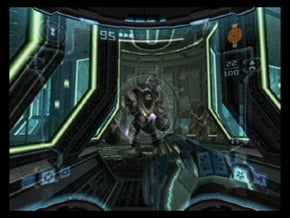
The Ingsmasher is quite a powerful foe. You’ll want to use some heavy firepower to take it down. When it first begins to move, hit it with a Super Missile. If it springs up an energy shield, use a charged shot from the opposite kind of beam to drop the shield, then set to work attacking it again. If it charges, stay locked on and dash around it to hit it from behind. Watch out for its ground pound attack. If it does that, double jump to avoid the shock wave. If it bends over and starts shooting electricity at you, simply strafe to avoid the blast.
There are two Ingsmashers to bestin the first area. Once they fall, go through the hex door to the Reactor Core. It isn’t a bad idea to use the save location to the right to get healed. Fight the Rezbits to get through the Core and head to through the Minigyro Chamber and the Hall of Combat Mastery (use the spider ball tracks to avoid a fight with the Ingsmashers) to get to Central Area Transport East. Ride the elevator up, head through Dynamo Works, Dynamo Access and on to the Main Gyro Chamber.
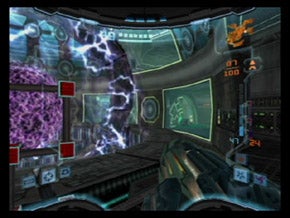
Take the elevator up to the higher level of this room. Roll over to the toppled canisters and use a Power Bomb to make a bomb slot appear. Hop up and bomb it to bring up another colored dot puzzle. Arrange it so that the lines go red, green and blue. This will make another bomb slot available. Bomb it to cool down the second ring. Go back downstairs and roll through the gap in the wall. Bomb jump and roll to the previous room. Go around the outer ring of the gyro and follow the path to Save Station B. Return to the gyro.
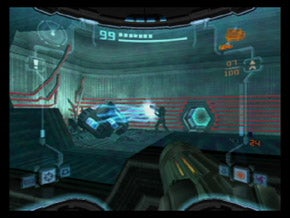
Walk out to the ring that surrounds it and look for the spider ball track on the dormant second ring. Go up and over the contraption. On the other side, boost into the cracked glass to bust through the window and get to a locked yellow door. As you step through, you’ll see Dark Samus rip through a squad of Pirates. Use the nearby crates to stock up on weapons then step into the next room and head through the hex door to trigger a new boss fight.
Boss:Dark Samus
When the fight begins, Dark Samus will activate the elevator you’re standing on, sending you both in motion as the fight commences. Be sure to scan her right off the bat so you don’t forget. This fight plays out very similar to the other one, with a few new wrinkles.
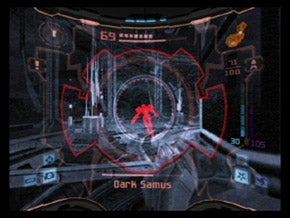
Dark Samus is still fast, and will rip around the arena, so don’t rely on too many slow attacks. Always lock on and try to hit her with as many Super Missiles or charged Light Beam shots as possible. The first leg of the fight won’t last long, so once you score a couple direct hits, prepare for a couple new attacks.
For one, Samus will turn into a morph ball and whip around the room, trying to boost and strike you. Use a charged shot to stop her in her tracks. If she pauses and touches the ground, get back or you’ll be damaged by her force field. If she rises in the air, she’ll turn into a ball and try to drill you, or shoot electricty from here hands. Both of these attacks can be dodged. If Dark Samus disappears, switch to the Dark Visor to pick her up (she’ll appear red).
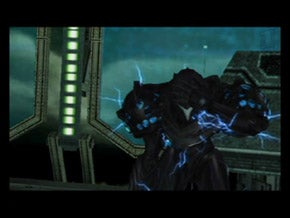
Continue to avoid her attacks and launched charged shots and missile barrages of your own to take herdown. If you need health, there are several crates around the edge of the room that will provide you a boost.
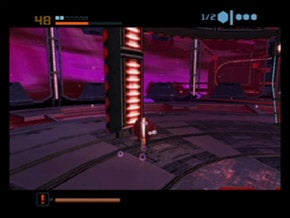
When the fight concludes, walk outside to where Dark Samus fell and turn left to find a narrow ledge. Walk along it to reach a portal and go through.
Dark Aether:Ing Hive
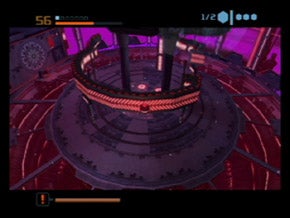
Activate the nearby Safe Zone and use the Ingworm Caches nearby to replenish your health. Follow the ledge back to find a spider ball track. Go up it to the platform above and drop. Roll over to the spinner here and rotate the circular spider ball track. Roll up it and boost when you get to the crimped edge. Jump across to the portal on the circular platform to get to the Light world.
Light Aether:Sanctuary Fortress
When you return, hop across to find the Echo Visor. Press down on the D-Pad to activate it. Use the device to locate several soundwave icons. Use charged shots to take down these targets. This will activate a central elevator, taking you back down to the room where you battled Dark Samus.

Get Echo Visor
When you step back into Checkpoint Station, you’ll see a message that all doors are locked. Use the Echo Visor to see the obstruction then target and shoot it. Return to the save location and save your game then head through Dynamo Works and back to the elevator. Go through the Hall of Combat Mastery and activate the portal at the other end, stepping through to the Ing Hive.
Dark Aether:Ing Hive
Head to the spider ball track in the Culling Chamber. Roll up and around until you reach a Dark Temple Key in an enclosure. Use a bomb to blast through the barrier around the Key and drop in to grab it. Retreat to the main room. Go back to the portal and go back to the world of Light.
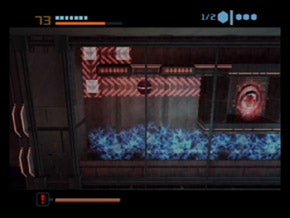
Light Aether:Sanctuary Fortress
Go back to the Reactor Core. On the same level as the hex door is a yellow door. Use a Power Bomb to open it and step through to the Transit Station. Blast the turret above and roll into the next room. Use a Power Bomb on the cracked pane of glass here to access another portal.
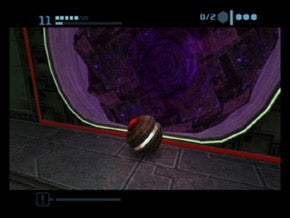
Portal Hopping
You’ll meet your first Dark Ingsmasher here, so be sure to scan it. Head through the area it bashes through and activate the portal here. Step through and go through the morph ball hole once you reach the other side. Go through the dark portal it leads to. Take the spider ball track up to find yet another portal. Go to the Light side again.
Light Aether:Sanctuary Fortress
Once there, roll up the spider ball track and over the room below to reach a Power Bomb Expansion. Return across the spider tracks to get to the hex door on the other side of the room.
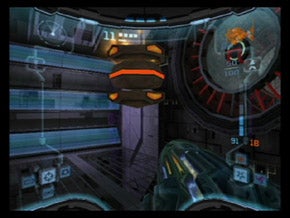
You’ll find yourself in Main Research. Make sure you scan the thing in the central tube–the Caretaker Class Drone.Then take down the Quads here and move to the glowing blue wall. Follow the spider ball tracks, jumping and dropping between them and avoiding the mechanized pieces that try to knock you off the wall. This series of tracks leads to a Missile Expansion.
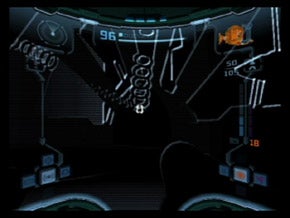
Move to the yellow door and use a Power Bomb to drop it. This leads back to Torvus Transport Access. Don’t go there now. Instead, scan the nearby Lore.Switch to the Echo Visor and use it to locate three soundwaves. Shoot each of them to open the locked door here. It will give you access to yet another portal. Activate it and go through to the Dark.
Part 15
Dark Aether:Ing Hive
Drop the Hunter Ing and use your Echo Visor to take down the soundwaves. There are three total, and once they are disabled, a door will lower, exposing a console. Scan it to change something in the Light world. Head to the bottom of the room (under the central cylinder) and go through the portal there.
Light Aether:Sanctuary Fortress
When you get back to the Light realm, you will have a mini-boss battle on your hands.
Mini-Boss:Caretaker Class Drone
Inside the glass tube, roll up the spider ball track. At the top, bomb jump to the circular spider track that leads around the tube. Robot arms will appear and try to knock you off of the track. As they near you, boost across to the other side of the arena. If you get knocked from your track, bomb jump up to it as quickly as possible–keep your finger on the R button throughout the fight, and you’ll always be clingy.
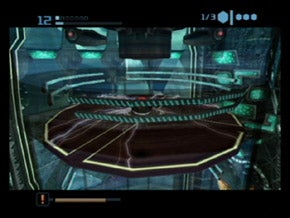
To defeat the boss, boost across the center of the area to hit the red piece of the robot appears. If you hit it, a health will appear. Be sure to grab that as you jump back across. After you take down several red pieces, a central piece will come down. Boost through it to pass each phase of the battle. There are three phases total, and each time the boss gets a little faster (and the spider ball tracks will be split into smaller sections). When you beat the boss, head up the spider ball track and follow the tunnel to a new hex door. Go through it to Central Area Transport West.
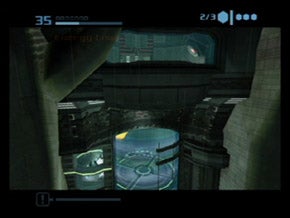
When you arrive in the room, a tube will come down, locking out the kinetic orb cannon. Use the Echo Visor to eliminate the guard and roll into the cannon. It will pinball you up to the top of the shaft, where you’ll find some crates (which you should use if you need to refill your health).
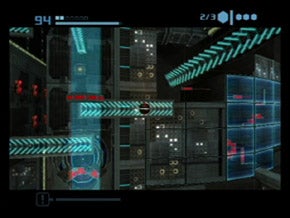
Inside the Watch Station, take out the Rezbits from afar and hop onto the rotating platform. As you get to the other side of the room, hop off near the light door and scan the hologram for some Lore. Leap over to the platform with spider ball tracks and bomb jump up to them. Roll to the right and bomb jump up to the angled piece of spider ball track and roll toward the center of the room. Drop off to the circular platform to the kinetic ball cannon there.
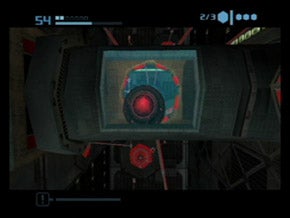
The cannon will launch you to another spider ball track, so hold the R button while airborne to cling to it. Roll right and use bomb jumps to get to a moving track. As you reach a set of red bars, drop a bomb to a track heading the other way. It’s the same headed the other direction–drop a bomb as you reach the red bars to go over to a small section of track. Roll to the left and drop to a grid of tracks. Move to the bottom left corner of it and drop to a track leading left. Use this to get to another set of circular moving tracks and bomb jump at each set of red bars to get to the promised land. Roll through the tunnels until you reach one heading back (not to the right) and go back there to get a Beam Expansion.
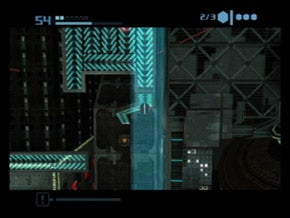
Head out of the tunnel to the right, repeat the whole process and get back to the grid of spider ball tracks. Instead of heading down the bottom left side, go down to the bottom right and roll back to the bomb slot. Push up as you fall to enter it. This will unlock the portal below. Drop to it and activate the portal to go to the Dark realm.
Dark Aether:Ing Hive
In the Dark, this room is called Aerial Training Site. Use the Dark Visor to see and take down the Dark Pirates here. Once they fall, go through the hex door to the right (you’ll have to space jump up to it). In the next area, Judgment Drop, target and eliminate all of the Dark Preed before proceeding. Swing across the gap, transferring from grapple point to grapple point. On the other side, land on the platform, and use another nearby to get to the portal below. Go through to the Light realm.
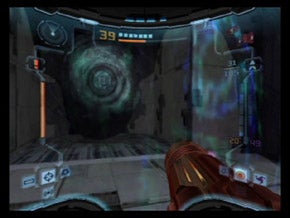
Light Aether:Sanctuary Fortress
Once there, hop to the platform and back above, going through the hex door to Vault. Take down the Rezbits here and go across the bridge. Behind the barricaded power-up is a bomb slot. Use it to activate a portal under the door you came through. Scan the console to drop the bridge down a level. Go across and return through to the Dark realm.
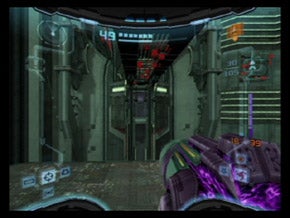
Dark Aether:Ing Hive
Be sure to scan the Dark War Wasp here then blast them all to clear a path. Swing back to the central area using your grapple beam. On the opposite platform, scan the gate to activate the portal and go back to the Light.
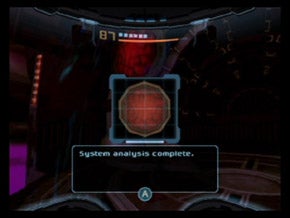
Light Aether:Sanctuary Fortress
Hopto the platform to the left and dispatch the Rezbits you encounter. Leap over to a higher platform containing a spinner and spin the platform you’re on. Head across the floating discs to reach another one in the left corner near theFortress.
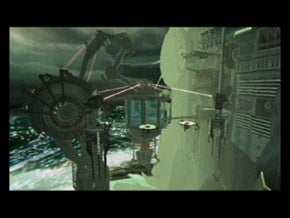
Once that one is done, backtrack and do the other side, using the spinners at the corners. When all four have been activated, return to the portal and go back through.
Dark Aether:Ing Hive
Once back in the Dark, swing back across the level and go back through the portal.
Light Aether:Sanctuary Fortress
Go back across the bridge and find the bombslot. Useit again to gain access to the Screw Attack.Press B to jump, press B again to space jump. Press B repeatedly after that to Screw Attack. Head back across using your newfound power and go through the hex door to the Grand Abyss. Use the Screw Attack to cross that large gap and move to Main Research. Go back through the Dark portal here.
Get Screw Attack
Part 16
Dark Aether:Ing Hive
Hop up to the ring around the central cylinder in this room and use it to leap up to a ledge at the edgeof the room.From here, jump up to the corridor leading to thehex door. Through this is a wall that you can use to wall jump up a shaft (make sure you scan the surface of the wall to do some Research). Use the Screw Attack to launch at the wall then press B as you hit theopposite wall to leap up higher. Repeat this all the way up the shaft until you reach the top. Use the Ingworm Caches at the top to replenish energy if you’re running low.
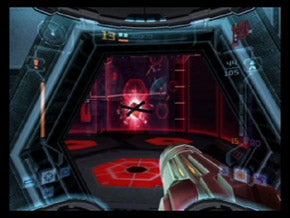
Step through the next door to find a Dark Temple Key. Scan the nearby console to drop the shield, kill the Pirates in the room and use the Screw Attack to get to the opposite side of the room (toward theportal). Use the wall jump in front of the portal to leap up to a Missile Expansion. When you are done with that, head through the portal.
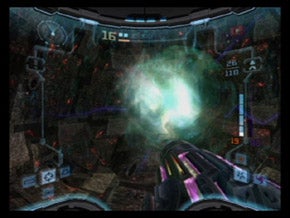
Light Aether:Sanctuary Fortress
You’ll arrive back in the Watch Station. Go through the light door here to reach Watch Station Access. Scan the console on the ledge below to drop a number of grapple points. Jump to the ledge below and snag the Energy Tank there.
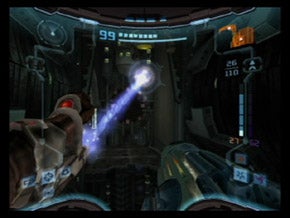
Use the grapple beam or Screw Attack to cross the gap and head through the Light Door. Navigate back to Dynamo Works. Use the portal there to return to the Dark realm.
Dark Aether:Ing Hive
When you go Dark, head through the light door and move to Hive Dynamo Access. Kill the Warrior Ing here and activate the Echo Visor to see the soundwaves. Shoot them to drop the door ahead and move through it.
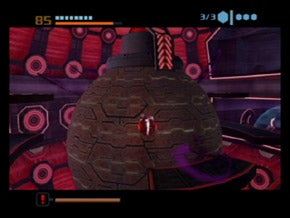
Head to the large sphere in the next room and stand on one of the ledges. Turn into the ball and boost to the sphere, hanging on with the spider ball. Navigate to a vertical spider ball track, watching out for tentacles on the sphere. When you reach the bullseye, boost to a ring (make sure you’re holding down R). From this position, you will be able to see the last Dark Temple Key.
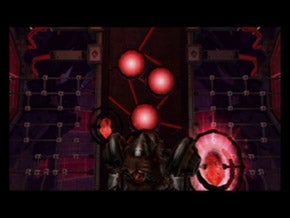
Head back to the sphere and use it to boost across to various doors in the room. Go through the very top door in the area and head through Hive Gyro Access to a Hive Ammo Station. The red missile door leads to a Save Location, so be sure to use that. After saving, go to the final remaining door (the one with two red beacons of light) and head through. Your Temple Keys will unlock the door leading to a boss fight.
Boss:Quadraxis
Make sure you get your scanning finger ready, because this boss takes a lot of forms, and all of them need to be scanned. Quadraxis is basically a beefed-up version of a Quad. A really beefed-up version that throws everything imaginable at you.
The first part of this fight has you dodging attacks and trying to break the big beast down to a more manageable size. It willtry to shoot you with lasers, step on you, shoot rockets and more. Most of these attacks are fairly easy to dodge, but if you get locked on, switch to the morph ball and boost away from danger. The same is true of the spin attack. Try to boost away from it… It won’t always work, but sometimes you’ll avoid damage.
To fight back, target the knees of the creature as they turn blue. Use two Super Missiles to take down each kneecap, making the creature walk all wonky. Continue taking out knees. If you need health power-ups, switch to the ball form and boost through the red balls beneath the boss’ feet tomakeit rain power-ups.
When you finish blasting the knee caps off, the body will collapse at the center of the arena, and the head will take off on its own. Make sure you scan the head in this state and the body, then switch to the Echo Visor. Target the antenna on the felled body and use it to stun the head. When it’s stunned, scan it then shoot the antennae on the actual head to take it down. To pack extra punch, hit it with a Sunburst.
At this point, Quadraxis will summon some Quads into the arena. Kill them quickly and turn your attention back to him. When you finally knock the antennae off, the last stage of the fight willcommence.
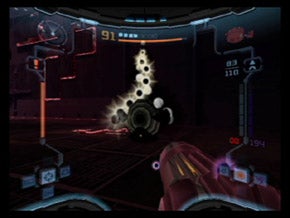
Get Annihilator Beam
For this part of the battle, soften the head up with some Light Beam blasts. When it slumps in the air, turn into the ball and head up the spider ball tracks on the boss’ legs. Wait for the boss to pass and boost into it, holding R to attach to its head. Roll to the exposed nodes on either side of the head an lay a bomb inside. Repeat the process until the boss falls. For your trouble, you’ll earn the Annihilator Beam.
Head to the door with small red squares lining it and use your new beam to open it. Use the bomb slot in the next room to gain access to the Hive Energy Controller. As always, go claim the energy. Return to the previous room and go through another Annihilator door.
Scan the Ingstorm in this room and use the morph ball to boost through it. You’ll find yourself in the Aerial Transport Room after going through the Annihilator door. Now that you have a new beam, hit the crystal with it and scan that, then hit a beacon with it and scan that. Go through the portal on the other side of the room to get to the Light realm.
Light Aether:Sanctuary Fortress
Go across the level and head to the Sentinel’s Path. Defeat the Mekenobites here and turn your attention to the puzzle at the midway point of the area. Turn on your Echo Visor and hit the central lock on the door to hear a series of tones. Now what you need to do is hit the keys one by one (Right Hand twice, Left Hand, Right Hand) to form the same sound. When the door opens, go inside to get the Missile Expansion. When you have it, leave and head through the Annihilator door. Make your way to Controller Access, spin the room and emerge in the Sanctuary Energy Controller. Walk toward the generator and you’ll restore power.
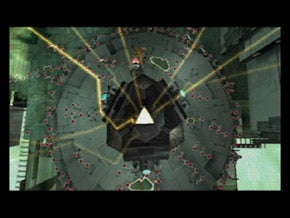
Part 17
Light Aether:Sanctuary Fortress
From the Sanctuary Energy Controller, head back to the Main Gyro Chamber. From Sanctuary Temple go to Temple Access. Use the Dark Visor looking over the Hex door you entered through to reveal a Multi-Lock Blast Shield. Unlocking will reveal a Kinetic Ball Canon. After being shot to the upper floor turn around and equip the Echo Visor. Shoot the sonic emitter and return to the Kinetic Ball Canon to move under the floor and collect a Missile Expansion. Head to Main Gyro chamber.Take both the down elevators and step into the nextroom.Activate the EchoVisor and switch to the Annihilator Beam. Target thecenter of the locked door to hear a series of tones. Repeat thetune by hitting the nearest soundwave beacon once, the far one once, and the middle one twice.This will unlock the door, revealing a kinetic ball cannon.
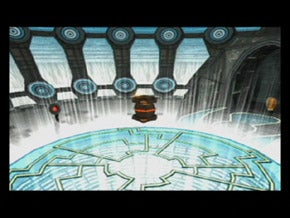
Roll into the cannon to get launched up into the sphere, revealing a Power Bomb Expansion. Once you have it, head through Dynamo Works to the elevator in Central Area Transport East.Headto the Hall of Combat Mastery. Once here, go toward the portal room. Drop a Power Bomb in the glass hallway leading to the portal, shattering the floor. Head through the hex door that you can now access.
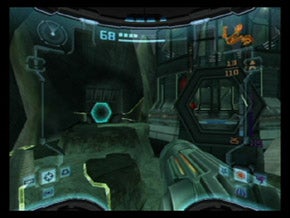
Take out the Quad MB and go through the next room to find the Transport to Agon Wastes. Activate the elevator and step on the hologram to go there now.
Light Aether:Agon Wastes
When youback to the Wastes, it’s a good idea to saveif you haven’t recently.Power Bomb the yellow door and roll into the ensuing morph ball hole. When you emerge in the Main Reactor, scan the Luminoth corpse for some Lore. Roll down the spider ball track and go around the corner to find another. Roll. up it and boost across to a moving cylinder. Move around the spider ball track on the cylinder and boost to the next one. Repeat this all the way across (jump right off the last cylinder when it is at the same level as for all the other jumps) until you reach a Missile Expansionunder glass. Use a Bomb it to grab the power-up.
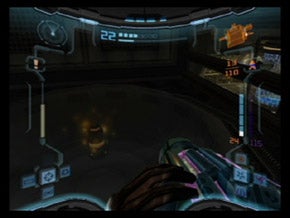
Take the eleavator up and follow the path past the dark door and move through to Sand Processing eliminating the turrets (you can proceed to save from here if you haven’t already). Use the halfpipe in Sand Processing to boost up to a small tunnel (near the front of the room, where the turrets show up). Roll back and bomb jump into the tunnel then continue to a room with a bomb slot. Scan the Sand Control system to activate it then drop a bomb in the bomb slot and you’ll see the sand drain out of the previous room, exposing a Missile Expansion. Go grab that.
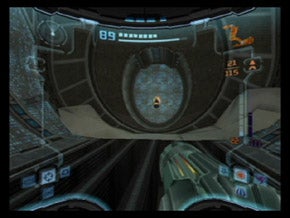
Backtrack to the Main Reactor and go through the dark door to get to the Command Center via Security Station B. Use the portal here to head to the Dark world.
Dark Aether:Agon Wastes

In Dark Aether, go to the dark door on the higher platform and head through Oasis Access, Dark Oasis and the Hall of Stairs. Use the save station and continue on to Bitter Well and Phazon Site where you will encounter several Dark Tallon Metroids. Make sure you scan them then use a Light Beam charge shot and then a missile to kill them quickly. When they’re out of your way, head to the middle platform and use the Screw Attack to reach the Annihilator door at the side of the room. Go through the door to find the Sonic Boom. Using the Annihilator Beam, press and hold A to charge, then press Y to fire. Head back to the Dark Oasis and use the portal there to go back to the Light.
Light Aether:Agon Wastes
You will appear back in the Main Reactor. Head to the hex door that leads to Sand Processing. Go through here and continue to Bioenergy Production. Here, take down the Dark Tallon Metroids and activate the controls for the moveable platforms at the center of the room. Once they’re powered on, head to the other side of the room and drop all three sections of the middle tower to make it possible to get to the other side of the room.
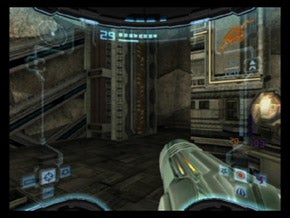
Once you’ve done that, locate the spider ball track on the North West side of this area. Roll through the ducts, using the spider ball tracks to bridge the gaps. Soon, you’ll get to a set of tracks that wrap around some curved platforms. Boost between them until you reach a track leading across the room. Follow it until you can boost to another strip of spider ball track. Finally, boost to the next ledge and grab the Missile Expansion from the next room. Alternatively, set the towers to 1,2, 3 (L-R), jump up the towers to the RH one. Then screw across to the green door behind which is the missile expansion.
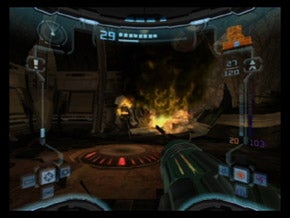
Head to the Biostorage Station. Upon arriving, scan the left panel for some Lore. Continue to the main part of the room and scan the Metroid Cocoons and the Infant Tallon Metroids that issue from them. Head through the hex door on the right side of the room and continue through to the Command Center, Command Center Access, Central Mining Station, Central Access and on to Mining Station A.

At Mining Station A, go to the lower portion of the area and turn on your scan visor. You’ll see a structurally unsound bit of rock (it will be blue on the scan). Roll over there and plant a Power Bomb to reveal a kinetic ball cannon. It will shoot you up to a spider ball track. Navigate to the left using drops and bomb jumps to get a Missile Expansion. Head to the Mining Plaza.
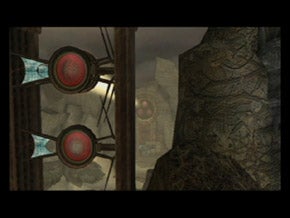
Use the Echo Visor in thiss area to help you find three soundwave devices to disable. This will cause the three large discs in this area to move, and expose a power-up. Follow the ray of light emanating from the side of the cavern to get to it. Use the Screw Attack to get over there, and you’ll score another Energy Tank. When you’re done, continue to the Transport to Temple Grounds. The hex door you need is right under your current position. You might find it helpful to use the save station here before leaving.the area.
Light Aether:Temple Grounds
Go through the Industrial Site and Collapsed Tunnel to emerge in the Temple Assembly Site. Take Temple Transport B up to the Great Temple.
Light Aether:Great Temple
Go to the Energy Controller and watch the cut scene with U-Mos. You have restored power to three of the temples, but one remains–The Sky Temple. Before you head there, though, you’ll get one last suit, the Light Suit. There is a teleporter now at the center of the Temple, but you can’t use it for where you need to go now. Return to Temple Grounds via Transport C.

Ligh Aether:Temple Grounds
In the Meeting Grounds head to the Hall of Eyes. Go up to the portal and head through to the Dark.
Dark Aether:Sky Temple Grounds
You’ll find yourself in Base Access. Drop from the narrow ledge and battle Inglets and follow the path to a green door. Blast it with a Super Missile andcontinue until you reach a halfpipe. Walk through it until you see what looks like a massive temple. Switch to the dark visor to see the targets and then use a Seeker Missile burst on the door of it to recover a Missile Expansion.
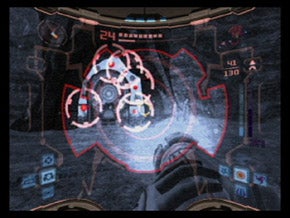
Continue to the hex door tucked into a hidden path. Go through the hex door and change to the morph ball to go to Shrine Access. When you roll out into the room proper, scan the Corrupted Sentreyes that are slicing up the room with their lasers. Use the Seeker Missile on the purple door and head through to Gateway Access, blasting the tentacles that cross your path.
After departing Gateway Access, you’ll be in Sky Temple Gateway. There is a ton of stuff to scan here, so spend some time doing that. There are nine keys and one testament here, which adds up to a bunch of Lore. Read the Lore for some hints on what to do next. Head back to Shrine Access and blast the green door there with a super missile.
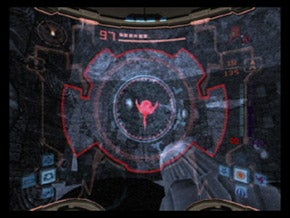
In Defiled Shrine, kill the Warrior Ing then switch to your Dark Visor and find the Flying Ing Cache. Hit it once, then scan it. Destroy it completely and it will drop one of nine Sky Temple Keys. Once you have it, return to Base Access via War Ritual Grounds and go back through to the Light world.

Part 18
Light Aether:Temple Grounds
Go through the Meeting Grounds anduse the halfpipe to get to Service Access. From here,go to the Landing Site and save. Go to theHive Access Tunnel and stay left to go to the Industrial Site. From here, go through the Collapsed Tunnel to the Temple Assembly Site. Use the portal here (shoot crystal with dark beam) to go to the Dark world.
Dark Aether:Sky Temple Grounds
You’ll find yourself in the Plain of Dark Worship. Scan the Ingclaw here and head across the area to find a Missile Expansion sitting alone in a small nook.
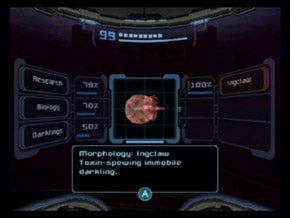
Use your Seeker Missile on the purple door and move through it. Shoot the Venom Weed in Lake Access and move to the Accursed Lake. Upon arrival, scan the dormant Ingclaw. Once that’s done, take down the Hunter Ing here and plop into the water, making your way through the murk to the opposite end of the level. Use the Dark Visor to see the Flying Ing Cache and drop it to get another Sky Temple Key, your second.
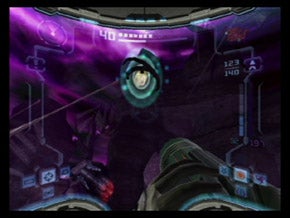
Return to the portal and head back to Temple Grounds.
Light Aether:Temple Grounds
Head through the hex door on the right of the Temple Assembly Site, heading to Dynamo Chamber. Use a Power Bomb on the gate that blocks your path. Roll forward and drop another one on the cracked section of wall to acquire a Power Bomb Expansion.
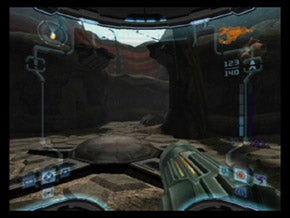
From here, use a Power Bomb on the next gate and continue to Communication Area. Follow the path forward until you see a ledge to the left. Use a Power Bomb on the glass bubble here. Drop inside to score another Missile Expansion. Go through the Trooper Security Station and Power Bomb the gate to get throughto the GFMC Compound.
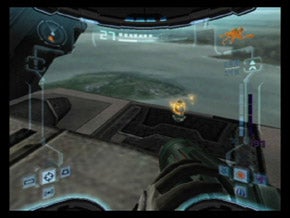
Go to the ledge near the hex door to Windchamber Tunnel, scan the corpse for lore and then use the Screw Attack to jump from the ledge over to the space ship. On the far end of the ship is another Missile Expansion. Now that you have the Light Suit, head back to Fortress Transport Acces and move to the yellow beam of light. It will zap you to a room that contains an Energy Tank.
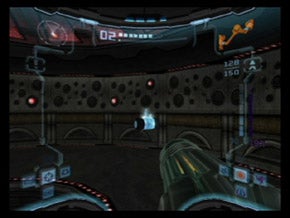
Return to the GFMC Compound, cross the Sacred Bridge and Follow it to Sacred Path. Head to the portal here and return to the Dark realm.
Dark Aether:Sky Temple Grounds
When you arrive, you’ll be in the Profane Path. Take down the Dark Pirates then switch on the Echo Visor. Use itto hit thesonically locked door at the other end of the area. With the Annihilator hit the keys in the right tonal order (far right, right, left, far right) to unlock the door and claim a Beam Ammo Expansion.
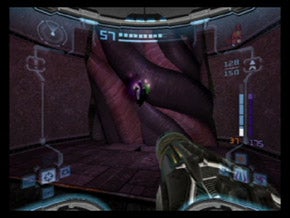
Head through the hex door at the opposite end of Profane Path to reach the Phazon Pit. Take down the Metroid then grapple across the gap and head through the door to Phazon Grounds. Kill all the Metroids here then activate the Dark Visor and leap on the platforms to get to the Missile Expansion.
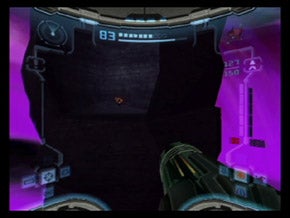
When you get it, head to the purple door and use seeker missiles to drop the lock. Go through to Reliquary Access. Go through the light door at the other end and step into Reliquary Grounds. Follow the path up and over a bridge to get to another hex door. This leads to the Ing Reliquary. Use the Dark Visor to light up your enemy and kill it to get the third Sky Temple Key. Once you have it, return to the portal and return to Light.
Light Aether:Temple Grounds/Great Temple
From the Sacred Path, where you return, head up Temple Transport A and continue to the Great Temple where you can save if you wish. Use the teleporter in the Main Energy Controller to head to the Agon Wastes.
Light Aether:Agon Wastes
You will arrive at the Agon Energy Controller. Head through Controller Access and Agon Temple and go through the dark door to get to the Mine Shaft. Follow it through to Mining Station B. Use a Power Bomb on the section of cracked rock on the left of the flat area with the sanddigger (scan the area if you can’t find it). Go through the light door to find Storage A, where you’ll get another Missile Expansion.
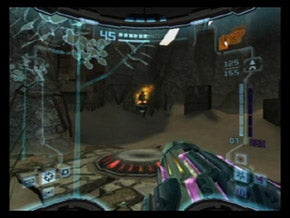
Return to Mining Station B and head back to the Agon Temple. Go through the light door to get to Sandcanyon. Use the Screw Attack to get over to the central platform. Drop a Power Bomb next to the cracked rock to uncover a Power Bomb Expansion.

Return to the kinetic ball cannon and shoot yourself across the abyss. Go through the hex door and roll through Ventilation Area A to the Main Reactor. Take the spider ball track down, the elevator up and follow the path to the dark door. Continue to the Command Center.Go through the portal to the Dark realm.
Dark Aether:Agon Wastes
Go to Dark Oasis when you get to the Dark side. Use a Power Bomb on the cracked wall near the door and plop into thedark water. Switch to the Dark Visor and look for the Ing to kill. Doing so will yield the fourth Sky Temple Key. Five togo.
Go to Doomed Entry and go through to the Feeding Pit. Go into the murky water and explore to find the Power Bomb Expansion. Return to Doomed Entry and hop up to the dark door to proceed. Go through to the Battleground. Kill the Warrior Ing here and activate your Dark Visor. This will show you several floating platforms.
Hop from one platform to another,across the room (if you fall off, go back to Double Path and try again). Find the Flying Ing Cache once you reach the other side andtake it down to get the fifth Sky Temple Key. Once you get it, blastopen the green door and step through the door to get to Warrior’s Walk.
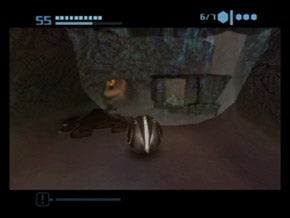
Power Bomb the weak section of floor above thePhazon in this room and boost back to find a Missile Expansion. Keep moving through Judgment Pit toJunction Site, where you will roll into a morph ball tunnel. Roll to a spherical structure with a channel running through it. Pop up to the spider ball track and roll up to the bomb slot. This will rotate the structure, allowing you to gain access to the Missile Expansion below.
Keep moving to the Duelling Range and go through the dark door here to Ing Cache 4. There is a morph ball hole here (right asyou step off the first ledge)that willl access another Missile Expansion. Once you have it, proceed through Save Station 2 through the Crossroads and on to Portal Site. Use the portal there to head back to the Light realm.
Light Aether:Agon Wastes
Go through to the Transport Center. Here, boost up the low side ofthe halfpipe. Head through the hex door and use the Transport to Torvus Bog.
Part 19
Light Aether:Torvus Bog
When you arrive in the Bog, go through Torvus Temple and the Underground Tunnel to Torvus Grove. Switch to your Scan Visor and spot the two tree roots that glow green/blue. Use Power Bombs on each to topple the overgrown plant, revealing a Missile Expansion.
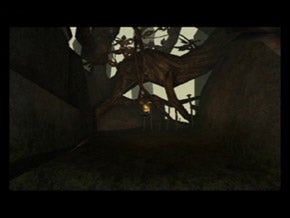
Head across this area to the opposite hex door and go to Meditation Vista. Use the Screw Attack to make your way over to the moving platform in the distance. Once you reach it, ride it over to get an Energy Tank.
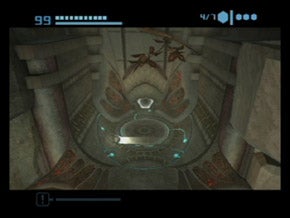
Return to the Torvus Grove and use the halfpipe to get up to the dark door. Move through Grove Access to the Forgotten Bridge. From the dark door, head slightly left to find a locked missile door. Blast through it and continue to Plaza Access. Use bomb jumps to maneuver to the bomb slots here and bomb them to change the path. Bomb jump to the area above the second piece you rotated and head into the tunnel it leads to. Outside, use the halfpipe to boost up to the Missile Expansion on the right.
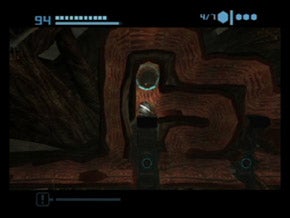
Return to Plaza Access and head for Torvus Plaza. Use the halfpipe here to boost up to a spider ball track on the right side. Maneuver through the first part of the puzzle, bomb jumping, dropping and rolling across narrow platforms until you reach a section of rotating spider ball tracks. Time your jumps to climb it and head over to the next one. To get past this, jump to the first little square of track, then fall to the track below. Roll right and hop up to the next square over. This will allow you to get to the top of this part of the puzzle. Continue until you reach a kinetic ball cannon and use it to shoot over to an EnergyTank.
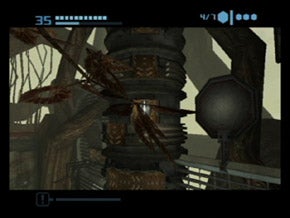
Return to Forgotten Bridge and find the portal. Go through to the Dark.
Dark Aether:Torvus Bog
Head to the untouchedyellow door at the bottom of the room (you’ll have to kill some Dark Pirates first). In the Putrid Alcove, go into the purple mire andflip the Dark Phlogus. Roll to the edge of the swamp and bust the cracked rock with a Power Bomb to earn a Power Bomb Expansion.
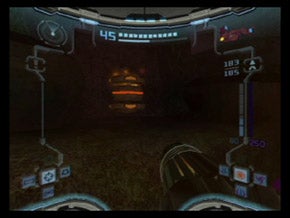
Continue to the Poisoned Bog. Drop into the water and turn on the Dark Visor to see the Flying Ing Cache. Explode it to get the sixth Sky Temple Key. Go back through Putrid Alcove and into Dark Forgotten Bridge. Use the portal there.
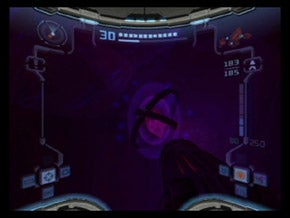
Light Aether:Torvus Bog
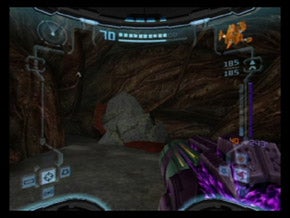
From Forgotten Bridge, go through the Abandoned Worksite to the Great Bridge. Use the Morph Ball canon to find the ledge directly across from the Temple Access door and use a Power Bomb on it to open a tunnel. This leads to a Power Bomb Expansion. Go across the bridge to the Torvus Temple and take the elevator down. Continue to Underground Transport and go down again.
In Hydrodynamo Station, go all the way to the bottom of the water. Go through Hydrodynamo Shaft to the Hydrochamber. Use the spider ball track in the side room here to get to a portal. Head to the Dark side.
DarkAether: Torvus Bog
Right when you arrive, you will see two walls that will allow you to wall jump up to a Missile Expansion.

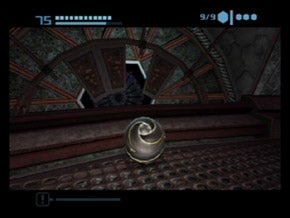
After you get it, use the spider ball track in the outside room to get up to the bridge, which you should follow up to the Undertemple Shaft. Continue on to the Sacrificial Chamber. Use Power Bombs on the pieces guarding the light and dark doors then head through the dark one. In Undertransit Two, hop in the ball cannon to shoot yourself into the tunnel. Avoid the pistons as you roll through then time a jump on the final piston to get up to another cannon that will take you the rest of the way.
When you get to the Dungeon, head underwater and scan the Watchdrone you find there. Use the Light Beam on the beacon above it and the drone will move away, revealing an opening in the wall. Roll through it and repeat the process on the next drone you see.
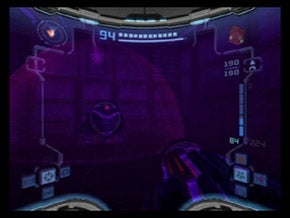
In the next chamber, use the Dark Visor to see a Flying Ing Cache. Shoot and destroy it to get the seventh Sky Temple Key. Go back to the Sacrificial Chamber and through Undertransit One to the Crypt and head through the portal there to get back to the Light.
Light Aether:Torvus Bog
In the Gathering Hall, find the Annihilator Beam door and go through to Tunnel Transit South. Roll to the left and find a bomb slot. Use it to change the current in the tunnel. Head up to the top of the area (using multiple bomb jumps to get up the shafts of current). Activate the second slot and drop back down under the wire cage. Go all the way to the top, then far to the right to find the final bomb slot.Go back onetunnel left and double jumphere to claim the Missile Expansion.
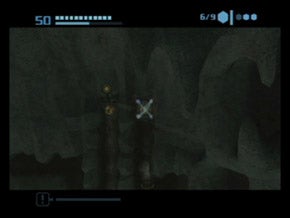
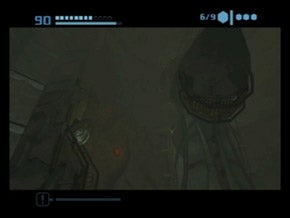
Once you have it, head all the way left and exit to the Catacombs. Keep going to the Training Chamber. If you haven’t already, scan the Lore here and scan the Dark Bloggs for some Creature info. When they are dead, roll up the spider ball track and boost across to a semi-circular track. Roll under it andboost over to the track. Bomb jump across the spider tracks and head up until you see arounded mass of tracks on the ceiling. Head toward the statue and drop down to the platform below. Hop up to the bomb slot and activate it then fall into the water and claim the Missile Expansion that is revealed.
When you have it, roll up the spider ball track and power bomb the yellow door to get to Fortress Transport Access. Head across the rotating platforms to get to the opposite door and go up to elevator to Sanctuary Fortress.
Light Aether:Sanctuary Fortress
Go through Main Research and Transit Stationto the Reactor Core. Save if you need to then proceed around to the Sanctuary Map Station. Walk into the yellow beam of light there to transport yourself in front of another Missile Expansion.
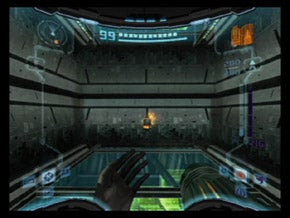
With your new missiles in hand, go to the Hall of Combat Mastery. Use the portal there to slip back into the Dark.
Dark Aether:Ing Hive
Head into the nearby hex door to reach the Hazing Cliff. Be sure to scan the Dark Diligence Drones here (Light Beam works best) and continueto thetunnelto get another Missile Expansion.
Go through the Culling Chamber to Unseen Way and use the Screw Attack to cross the gap, emerging in the Hive Reactor. Move to the bottom floor and head to the yellow door, blasting it open with a Power Bomb. In Hive Reactor Access, manually target the beacon at the center of the room and nail it with a Light blast to take down the Nightbarbs.

As you move through the Entrance Defense Hall, be sure to scan the Ing Larva Swarm there. Keep moving to Hive Entrance. Use the screw attack to leap across the large abyss polluted with Preed. On the other side of it, step into the yellow beam of light and you’ll be transported up higher. Use the Screw Attack again to return to the other side. There is a Flying Ing Cache here… look for it with the Dark Visor and blast it to gain the eighth Sky Temple Key.
If you want to save, go back to the Hive Reactor and head through the red doorto find a Save Location. The opposite room is Ing Cache 1, and it contains an ammo station. Once you have the goodies, return to the Culling Chamber. Go through the portal to head back to the Light.
Light Aether:Sanctuary Fortress
Go to Central Area Transport East via Hall of Combat Mastery and ride it up. Go back through Dynamo Works to Dynamo Access and the Main Gyro Chamber. Go through Temple Access to the Santctuary Temple and head to Worker’s Path. Ride the ball cannon to the other hex door and step through to the other side of the Dynamo Works. Use the spider ball tracks in the Spider Ball Guardian’s lair to get to the final area where you fought him and roll into the tunnel (fight in the middle of the picture) where you got the spider ball upgrade. Inside is a yellow door. Power Bomb it to reach a portal chamber.
Dark Aether:Ing Hive
Once in the Dark world, go through the hex door to reach Hive Dynamo Works. Roll through the tunnel here to get to the main portion of the room. Roll up the spider ball track near the door and use it to boost to thefloating sphere (hang on with R, of course).
From here, roll to the red nodeand boost to another sphere as it enters your view. Use this to boost to another spider ball track on the wall to get to another ledge. Turn on the Dark Visor and look for the Flying Ing Cache. Drop it to claim the final Sky Temple Key. Return to the portal and go back through to the lighter side of life.
Light Aether:Sanctuary Fortress
Return through the Worker’s Path to the Sanctuary Temple and head on to the Energy Controller. Use it to warp back to the Great Temple.
Light Aether: Great Temple/Temple Grounds
Take Temple Transport C down to the Meeting Grounds and go through to the Hall of Eyes. Use the portal here to get to the Dark realm.
Dark Aether:Sky Temple Grounds
From Base Access, go to the War Ritual Grounds and head through Shrine Access to the Sky Temple Gateway. Head to the center of the area to deliver the nine keys to their appropriate place. When this is done, you will be able to access the Sky Temple through the yellow beam at the center of the room.
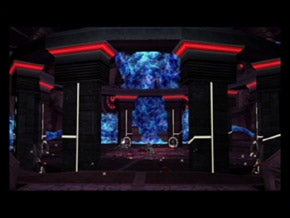
Dark Aether: Sky Temple
When you reach the Sky Temple, use the Save Location at the top of the room and proceed around to the hex door. Wall jump up to another hex door and get ready for a major boss fight.
Boss:Emperor Ing
As always, make sure you scan the boss–and various parts thereof throughout the fight. There are five scans total–the Head, Body and Eye in the first stage, the Chrysalis in the second stage and the Mutated Emperor Ing in the third stage.
Stage 2
In the first stage of this fight, the Emperor Ing will use its tentacles to try to damage you. It will do this by sweeping them across floor. Watch out… sometimes it will sweep around a couple times at different levels, so always be watching. Double jump to avoid this attack. If the tentacles glow purple while flinging around the room, the best tactic is to shrink back near the wall. Be sure that you you don’t step on the Phazon that rings the room, or you’ll take constant damage.
Often,the bosswill gather all the tentacles together and create a ball of energy, which it attempts to whip at you. If you can manage it, this is a good opportunity to take out the tentacles with some missile blasts. Don’t stick around for the energy ball, though, as it will rock your health bar good.

To drop the first form of the boss, target its tentacles with the Annihilator Beam and use three or four shots per limb to take it out (you can also use missiles). If you want to try to get them all at once, drop into morph ball form when the tentacles sweep the floor and use a Power Bomb. When all of the tentacles go inside, it’s time to focus on the giant eye that forms. You will have to target between the gap to do any damage, so make sure you dash against the way it’s turning to get a good shot off. Try to hit this form with a Sonic Boom, or Super Missiles. If these attacks are too slow, and you find yourself missing often, a charged-up Light Beam also works nicely, and fires a lot faster.
The boss will only stay in the vulnerable state for a matter of seconds, then it will revert to the tentacle form. Each time, the tentacles will grow in number and be a little more vicious. In addition, a new portal attack will be added to the mix. The best way to avoid this is simply to lock on and back up. When you finally chisel this form’s health down to zero, the second stage will begin.
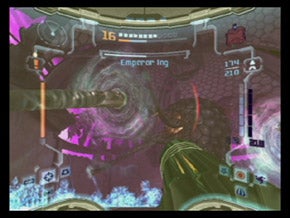
Stage 3
Stage Two is an opportunity to get some of your health back if you play your cards right. To begin, turn into the morph ball and roll up onto the Chrysalis using the spider ball powers. The room is filling with caustic gas, and will eventually fill completely, so make sure you work fairly quickly. Stay out of the gas as it rises and falls, and beat the boss before the room is completely filled with vapor.
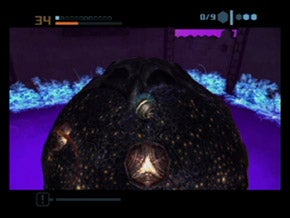
Roll around the surface of the boss and look for nodes that tentacles appear from. Just as a tentacle is about to appear a couple bubbles of Dark Ing will appear there, so lay multiple bombs in that area to take them down. When you effectively explode a node, gas will emit from it. Bombing all of them will slay this form.

As you move around the surface of the boss, puddles of Ing will chase you around. Bomb them to yield power-ups and heal from the brutal fight you just survived. You can leave one tentacle un-bombed and collect stuff until you refill most of your supplies, then bomb the last one when the gas appears imminent. Once the last tentacle goes down, it’s on the the final form.
Stage 3
The Mutated Emperor Ing looks like a large, nasty Warrior Ing. Its heart is protected, so you need to make it a different color to damage it. When fire appears in its mouth, shoot a Super Missile into the craw to change it to a different color. When it turns dark, use Light Beam to damage it. When it turns light, use Dark to damage. Or, if you’re having trouble scoring hits with Dark, resort to the Annihilator Beam in quick bursts to loosen it up. Don’t ever waste ammo when the creature’s mouth is closed.
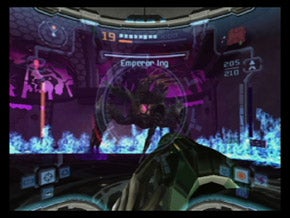
Most of the defense in this stage is about dashing away from the creature’s attacks. It will create shafts of energy much like the Warrior Ing and shoot those at you, and it’s just a matter of sidestepping them. When the beast charges, get on the move, either to the side or straight under it. Quickly turn and lock again and be ready to dish the next helping of pain. When the Emperor falls one fight remains.
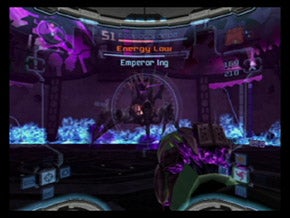
However, first you need to get out. Use the platforms at the center of the room and Screw Attack over to the hex door. Once through, drop down the wall climb shaft and head to the teleporter in the next room.
When you arrive in the Temple, it’s time for the final battle.
Boss: Dark Samus
The Dark Samus battle is in two stages, so be sure to scan her at both times.
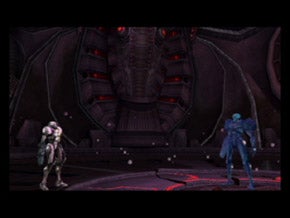
Stage 1
In the first leg of the battle, Dark Samus likes to rise in the air and pummel you with a concentrated Phazon beam. During this segment of the battle, use the normal visor to see what she’s up to and dash or strafe away from this attack. Whenshe turns invisble, change to the Echo Visor and track her that way. Hit her with Light shots or charged Power Beam until she rises again, then switch back to normal view.

When Dark Samus switches forms, be sure to scan her. This time, she will rise in the air and surround herself with a sphere of Phazon. At this point, she will only be susceptible to Phazon herself. Dodge the Phazon beam attacks she dishesout by dashing while locked on.